Sew + Quilt in my Etsy shop, + in the Oregonian! November 10, 2020

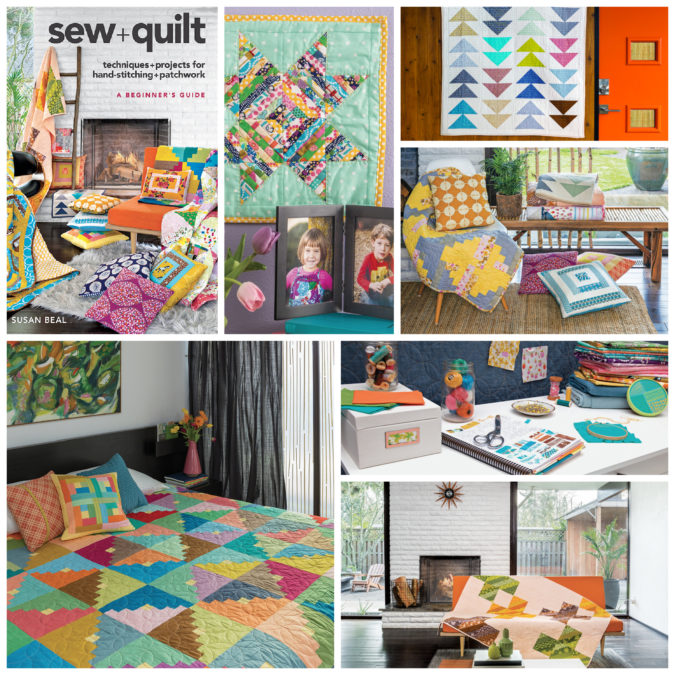
I am very happy to share that I just put signed copies of my newest book Sew + Quilt for sale in my Etsy shop. Sew + Quilt is my favorite book I’ve ever written and I hope it inspires you, or a friend or family member, to try something new!

I wanted to share a few of my favorite projects from the book! Clockwise from the top in the photos above: Birthday mini; Flying in Pairs; Sunlight baby quilt and several pillows and minis; my sketchbook with all my book sewing and quilting; Floating Crosses; and my Joys and Sorrows wedding quilt.

If you’d like a copy of Sew + Quilt personalized to you or to someone special as a gift, please let me know and I’d be glad to write a message. Just click “add your personalization” (which I highlighted above with a few colorful stars!) and type in the name or special dedication you’d like in the drop-down menu. If you’d like to share more details on personalizing the book, please message me or write a note to seller on Etsy. Media mail shipping in the U.S. is included at no charge.

I was very honored that my Floating Crosses from Sew + Quilt was also included in “A Stitch in Time,” an absolutely wonderful article about Oregon quilt history and makers’ creativity in the Oregonian recently, as part of Portland Textile Month. Thank you to my friend MaryLou for sending me a paper copy so I could see it in print, which was lovely! You can read the entire article here (as a PDF):

Thank you so much to Mims Copeland and Janet Eastman for including my quilt in such a special feature! I was very humbled to have my work shown alongside the story of the incredible Afro-American Bicentennial Heritage Quilt, made by Jeanette Gates and 14 other Black women artists in Portland over several years in the 1970s.

Finished for the Bicentennial celebrations in 1976, the quilt “reflects 500 years of America’s Black history not seen in textbooks,” as historian Mary Bywater Cross describes. This stunning 30-block collaborative quilt, a piece of living history, is now in the permanent collection of the Oregon Historical Society. After it was stolen and found damaged by rain last month, it is being carefully restored by textile conservationists. It will be a joy to see it displayed in the museum again.

Recycled Jar Terrariums! April 23, 2020

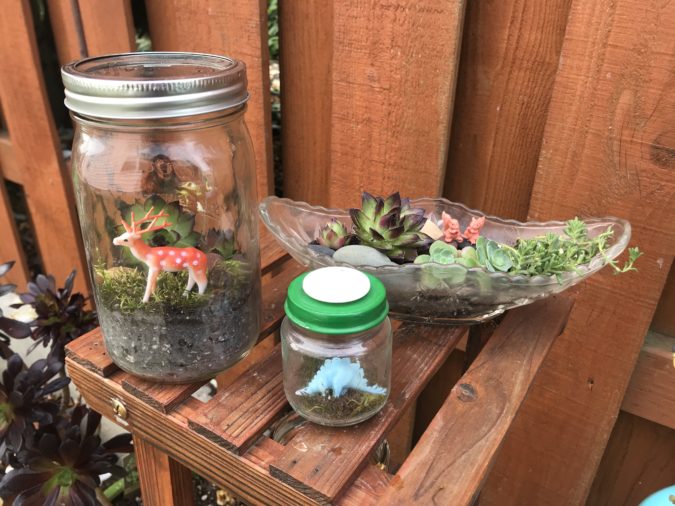
I’m so excited to share my new video tutorial for making Recycled Jar Terrariums! I’ve been making terrariums and dish gardens for years, and my Girl Scout troop wanted to try them out too, so Andrew and I filmed a video this week – and Pearl edited it! I included my three favorite kinds – a basic jar terrarium, a tiny version in a baby food jar, and a simple, beautiful dish garden.

I’d love to see yours if you make one! Please leave a comment or email me at troop45210@gmail.com.

in our America January 20, 2017

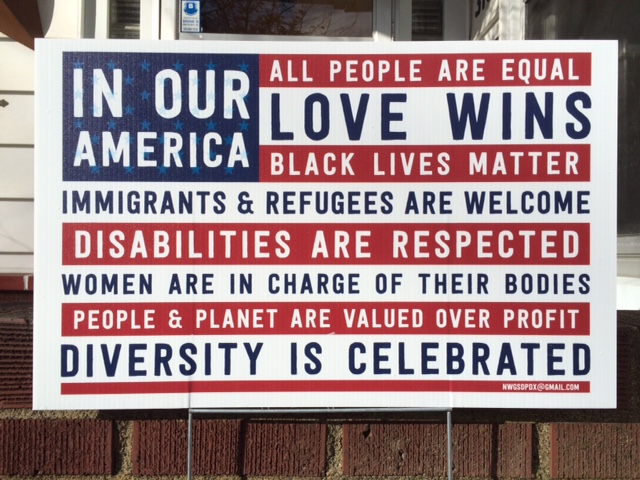
In Our America sign - NWGSDPDX

In our America…

a group of women, NWGSDPDX, quickly organized here in Portland, Oregon in the aftermath of the divisive presidential election to send a powerful message of inclusiveness, respect, and love for all.

We based our “In Our America” graphic on a design that local artist Jason Maxfield created. We collaborated with graphic designer Sean Donnell to create the modified United States of America flag design. In doing so, we created a flag worthy of the definition of patriotism–“love for or devotion to one’s country.” Our flag includes and upholds the rights of all people, along with the preservation of our planet.

In Our America sticker - NWGSDPDX

NWGSDPDX had signs and stickers printed we could proudly display, distribute, and share, with all money raised going to the Lutheran Community Services Northwest’s housing emergency fund, which subsidizes rent for incoming refugees.

And under a Creative Commons license, NWGSDPDX has made the In Our America files available, for free, to download and print.

Since our primary goal is to get this message of inclusivity out and about, we are providing pdfs of the artwork to allow people to print these items on their own. The images are licensed through Creative Commons and are not to be altered or used for commercial purposes. In Portland, we have distributed the posters to businesses and schools to display and they have been very well-received. We hope you will do the same in your community.

In Our America - NWGSDPDX

The original In Our America flag in English has now been translated into Spanish and is also available to freely download and print.

En Nuestra America - NWGSDPDX

NWGSDPDX has done so much to get these signs, stickers, and posters out into the world. In addition to the free printables to download and share, you can buy stickers and signs locally at many independent businesses in the Portland area, or order them to be shipped in a Power Pack (5 signs, 5 stickers, and 5 posters, including shipping, for $100).

$10 suggested for yard signs, $3 for stickers and posters. Sliding scale available if needed. Posters are provided free of charge for businesses and schools to display. If you are in the Portland, Oregon metro area, “In Our America” signs, stickers and posters can be purchased at many local businesses, including: 

N Portland:
-Comic Cave (St. Johns, 7315 N Alta Ave), comiccavepdx.com

-NoPo Paws (2148 N Killingsworth St,), nopopaws.com

NE Portland:

-Bella Pizza (2934 NE Alberta), bellapizzapdx.com

-Here We Go Again (2438 NE Broadway), hwga.com

-P’s and Q’s Market (1301 NE Dekum St), psandqsmarket.com

-Rooks Barbershop (2935 NE Broadway), rooksbarbershop.com

-Rooks Barbershop (5667 NE Glisan), rooksbarbershop.com

SE Portland:

-Books with Pictures (1110 SE Division), bookswithpictures.com

-Evolution Healthcare (905 SE Ankeny), evolutionhealthcareandfitness.com

-Tom Dwyer Automotive (Sellwood – 530 SE Tenino St), tomdwyer.com

-Unfold Studios (3249 SE Division), unfoldportland.com

-Rooks Barbershop (3580 SE Division), rooksbarbershop.com

-Wells & Verne (734 E Burnside), wellsandverne.com

SW Portland:

-Confluence Clinic (506 SW 6th, Ste 801), confluenceclinic.com

-Craft Factory (Mult. Village, 7832 SW Capitol Hwy), craftfactorypdx.com

-Finnegan’s Toys and Gifts (820 SW Washington), finneganstoys.com

-Here We Go Again (0511 SW Carolina), hwga.com

-Rooks Barbershop (1109 SW Taylor), rooksbarbershop.com

-Topanien Global Gifts (7832 SW Capitol Hwy), topanien.com

-Upper Westside Play Gym (1508 SW Sunset Blvd), upperwestsideplaygym.com

-Waterknot Cards & Gifts (217 SW 1st Ave), waterknot.com

Hillsboro:

-Black Sheep (6154 NE Brighton St), blacksheepatorenco.com

McMinnville:

-Hopscotch Toys (103 SE Baker St), hopscotchtoys.com

We thank these community partners and we encourage you to frequent their businesses and spread the word to your friends.

In Our America sign - NWGSDPDX

In challenging, frightening times like these, we must stick together, always do what’s right (even when it’s hard), help those in need, and lift each other up. I thank you for visiting my blog and supporting my crafts and writing. I will always write about and share what I think is important and true, in our America.

Love, Susan

Save

Save

Save

Save

Save

Save

handmade holiday gifts + craft projects round-up! December 19, 2016

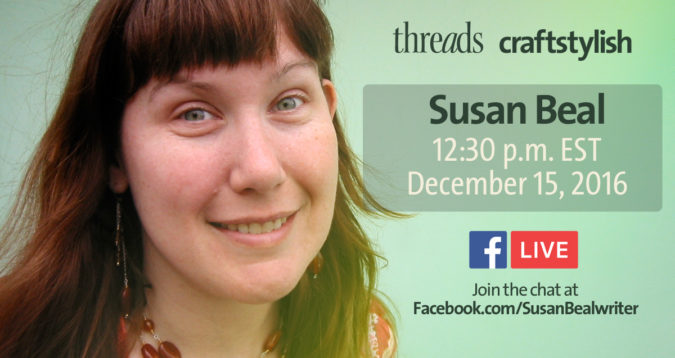
I got the chance to do a Facebook Live video on my craft writer page on December 15, sharing some of my favorite holiday and craft projects, which was super fun. I wanted to link to lots of those online tutorials I’ve written in a fresh new post, so they’re all in one place – click the links or the images to go to the how-tos. The video is archived and you can watch it any time, so let me know if you have any questions! Thanks to everyone who watched and had such nice things to say!

Susan Beal on FB Live, December 15

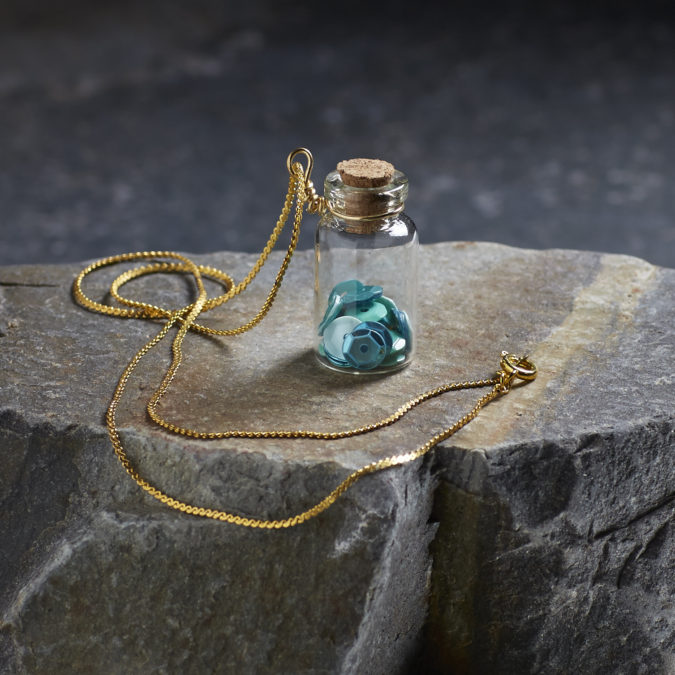
First, I showed some of my favorite projects from my new book, Bead Sparkle. I got to explain the basic process to make this this one in the FB Live video, and I also demoed my Sparkle Jar Pendant start on KATU Afternoon Live on Monday, December 19. (UPDATE: added the link to the KATU segment!) I got all my supplies at Collage, and they have copies of Bead Sparkle at 20% off at all locations, too.

Sparkle Jar Pendant - Susan Beal

Then I showed some projects I originally designed for CraftStylish.com a few years ago, which all have full tutorials up on the site! Here’s my Covered Button Bracelet. I love this project. I made a new version with Cotton + Steel fabrics for the book, but the technique is the same.

Covered Button Bracelet - Susan Beal

I love my Sparkle Flowers Handbag project, inspired by Enid Collins!

Sparkle Flowers Handbag - Susan Beal

And this Wedding Ring Pendant how-to has a simple video tutorial I made showing how to do the wire-wrap.

Wedding Ring Pendant - Susan Beal

My friend Cathy Zwicker contributed this amazing Triangle Duo Necklace to Bead Sparkle, which CraftStylish published this week!

Triangle Duo Necklace - Cathy Zwicker

And Cut Out + Keep shared my Sea Glass Necklace tutorial on their site when they featured Bead Sparkle as their book of the week!

Sea Glass Necklace - Susan Beal

Moving on to holiday crafts to sew, I shared my Christmas stockings I made my family – here’s the tutorial for my first three for me, Andrew, and Pearl, and the update with my little boy Everett’s stocking, and one for my mom!

Christmas stockings by Susan Beal

I also made a set of Pendleton wool Christmas Stockings when my book Hand-Stitched Home came out – the free tutorial on my blog is here!

Pendleton Wool Christmas Stockings - Susan Beal

And speaking of Pendleton, this is one of my favorite projects ever, and super fast to sew – Pendleton wool cowls!

I’ll be back after the KATU taping to add more links and the Sparkle Jar Pendant video! Happy holidays, and thanks so much for visiting my blog!


Save

Save

Save

Save

Pendleton Threads + the community of crafting December 2, 2016

Pendleton Woolen Mills has a wonderful new podcast called Pendleton Threads, and I’m so honored to be one of their first guests! My episode is Susan Beal and the Community of Crafting. Lauren Modica and I chatted about our creative community, Portland Modern Quilt Guild, the Pendleton Woolen Mill Store, the joy of making something by hand, and how I got the chance to write my book in partnership with Pendleton, Hand-Stitched Home.

Susan Beal & The Community of Crafting

You can listen to my episode right here, or subscribe to the podcast on iTunes: “The Pendleton Threads podcast shares true short stories about moments that connect us. Each episode weaves together interviews, history and first-hand narratives exploring family, adventure, tradition and more.”

Susan Beal - Hand-Stitched Home on West Coast Crafty

Thank you so much to Pendleton Threads for having me as a guest! I loved the conversation and the chance to celebrate our community!

Susan Beal on FB Live, December 15

P.S. I’m doing a FB Live event on my Facebook page with Threads and CraftStylish at 12:30 EST/9:30 PST on Thursday, December 15, sharing sewing and jewelry-making tips and techniques, and giving away signed copies of my new book, Bead Sparkle! What would you like me to cover – a project tutorial, tips for finding vintage beads, hand-sewing techniques? Please leave a comment or message me through my contact page – I’ll share more info the week of the chat!

Save

Save

Save

Save

bead sparkle at Blue Door Beads! October 11, 2016

Hello, California! I’m super excited to teach a free jewelry-making demo at the lovely Blue Door Beads in Oakland this month!

bead sparkle at blue door beads! - west coast crafty

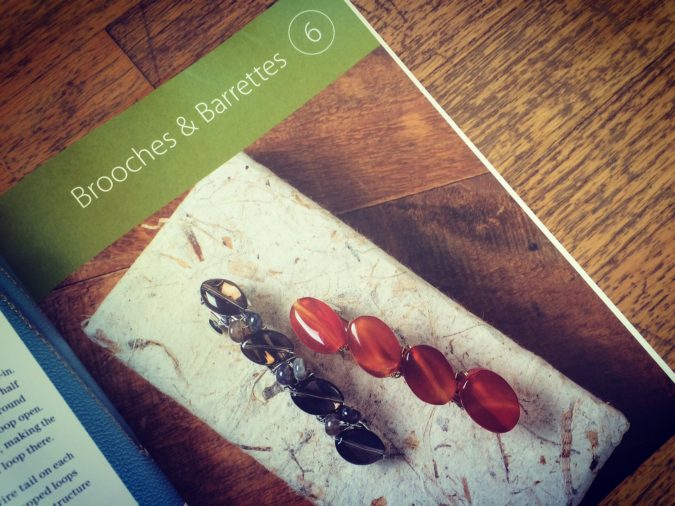
Please come by Blue Door between 12 noon and 3 pm on Saturday, October 22 to learn how to make a set of my Semiprecious Barrettes from Bead Sparkle.

bead sparkle at Blue Door Beads - west coast crafty

This is one of my favorite projects from the book – you can mix glossy, gorgeous semiprecious beads into a single-stone or complementary repeating pattern to embellish a simple barrette and elevate it into something really special! This structural wire-wrapping technique is so versatile and once you get the hang of it, you’ll use it over and over again to make all kinds of jewelry. Choose your favorite semi-precious stones – or go in your own direction with glass, Lucite, metal, wood, or whatever treasures you find in the beautiful selection at Blue Door – and you’ll wear your pretty new barrette home.

Bead Sparkle! by Susan Beal - west coast crafty

I’ll be sharing jewelry-making tips and signing copies of Bead Sparkle, and would love to say hi if you’re local! Please feel free to invite friends, I’d appreciate it so much if you can help spread the word. I love visiting the Bay Area and I can’t wait for my trip – thanks so much to Lydia, Sara, and everyone at Blue Door for hosting my event!

If you go:

Bead Sparkle demo & book signing at Blue Door Beads

Saturday, October 22 from noon to 3 pm

4167 Piedmont Ave, Oakland, CA 94611 – 510-652-BLUE


Save

Save

Save

Save

make it: Pendleton wool cowl! September 29, 2016

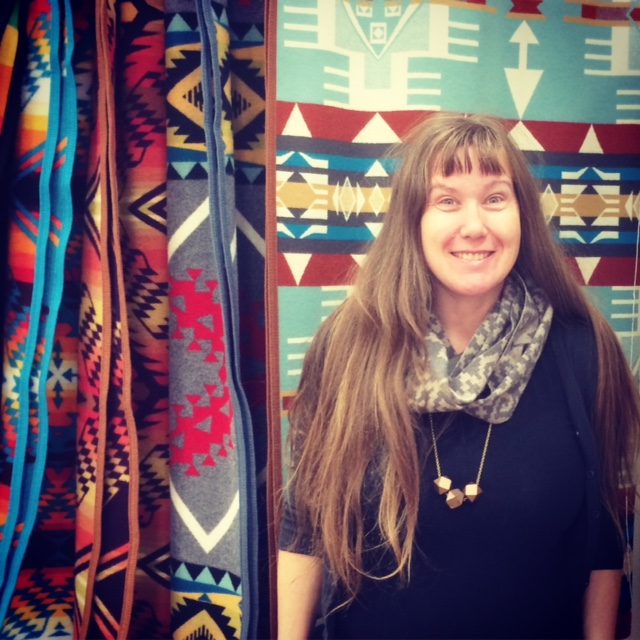
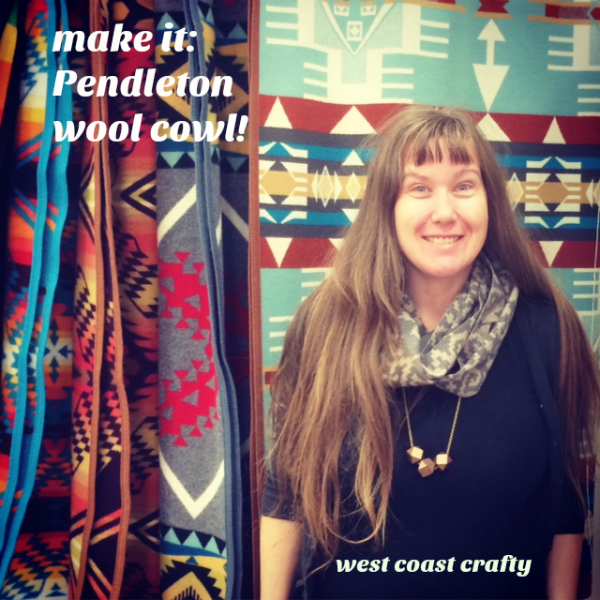
I love the Pendleton Woolen Mill Store, and after I visited yesterday and bought some new treasures, I wanted to share a free and beginner-friendly sewing tutorial: make your own cozy cowl from soft, beautiful Pendleton wool fabric! I’ve been wearing the one in the photo for the last year, on chilly mornings that slowly warm up, or tucked into a real coat on cold days as a perfect layer. It’s light, easy to wear, and feels amazing on. And this project uses less than a quarter-yard of your favorite jacquard, plaid, or solid lightweight wool, and you can sew it in a couple of minutes (okay, a little longer if you take some time to choose just the right decorative stitch on your machine, or need to wind a bobbin…).

Pendleton wool cowl how-to - West Coast Crafty

Every September the WMS has a huge sale – 30% off all fabric, plus lots of other good discounts. It’s going through 9/30, so if you can stop in in person, or call for mail order (866-855-9285), you can get an amazing deal on all the jacquard fabrics I used! My cowl uses an 8″ wide edge-to-edge cut (actually, a tear, since Pendleton wool is woven so precisely, it tears a perfectly straight edge along a clean grainline), so at .22 of a yard, it’s a very economical project, sale or not. Oh, and feel free to change the width – 6″ wide would make a narrower but striking cowl, 10″ would make a more sturdy version. This is a super-flexible project, and it doubles around your neck, so you see a lot of the pattern or color when you wear it.

Pendleton wool cowl how-to - west coast crafty

I chose a mix of different jacquards (the vivid, beautiful trade blanket patterns), each around $64/yard, but I included a favorite plaid of mine in this stack as an example of some of the other apparel-weight fabrics you could choose at around $34/yard. (Some quick math: at 8 inches/.22 yard, that’s $14 regular price, $9.85 September sale price, or $7.50 regular price, $5.25 sale price, to make one cowl. A lot of cozy luxury for a small investment in fine fabric!) You can also use a nice piece of any other lightweight wool you have, but make sure it’s measuring at or near 60″ wide, which is the edge-to-edge length on most Pendleton wool fabric sold off the roll. This is what I bought today.

Pendleton wool cowl how-to - west coast crafty

  1. So, you have your beautiful, soft wool fabric, measuring 8″ x 60″ – now what? Make one twist in the fabric to create a Mobius strip, and then pin your selvedge edges neatly together, overlapping them by about 1/2″. You’ll see that the pattern on a jacquard will show the opposite colorway when it’s been flipped – a beautiful contrast. (You can also skip the flip if you prefer, but I like how it gives the finished cowl a visual mix of pattern colors, not to mention the coziness of curving and curling around you, instead of hanging in layers perfectly straight, as you wear it.

Pendleton wool cowl how-to - West Coast Crafty

Here’s a close-up of how the selvedges look pinned, with the twist to the right. Pendleton selvedges are so nicely finished that there’s no need to cover them, you’ll just stitch the cowl with two clean, simple parallel seams.Pendleton wool cowl how-to - West Coast Crafty

2. First, stitch along the pinned selvedge with a straight stitch, back-stitching at the beginning and end of the seam to hold it securely. This is a reinforcing, durable stitch, nothing fancy, to join the ends together neatly.Pendleton wool cowl how-to - West Coast Crafty

3. Now, you’ll secure the other edge of your 1/2″ overlap with a decorative stitch (I was inspired by Lupine Swanson‘s beautiful, simple shawl from my Pendleton sewing book Hand-Stitched Home and her gorgeous decorative stitching – another awesome and super beginner-friendly project!). But you can also use another simple straight stitch if you like, or your machine is more straightforward. You can sew this with either side facing up; either flip it over, or stitch on the same side, parallel to the first seam. Essentially, you just need to catch the other selvedge neatly, and add some style there if you like. The below photo shows my finished seam, but with the needle in the right spot, so you can see it’s running parallel to the first straight stitches. This whole process should take you about 1/10 the time it does to read this paragraph!

Pendleton wool cowl how-to - West Coast Crafty

Here are four of the cowls and their seams for comparison: I used compatible thread colors, so the decorative stitches aren’t as obvious, but the top cowl is 2 straight stitches, and the others are different Pfaff ClassicQuilt stitch options (asteriks, leaves, and geometrics). They really do look nice close-up, if you’re into details!Pendleton wool cowl how-to - West Coast Crafty

And here are some of the cowls in action, thanks to Abby and Tracy taking an extra minute at the bus stop this morning! Please let me know if you have any questions and I’d love to see your cowls if you sew one – leave me a comment or tag me on Instagram or wherever you share a photo!

Pendleton wool cowl how-to - west coast crafty

Save

Save

Save

Save

Save

Save

bead sparkle party at collage! September 20, 2016

This Sunday afternoon, September 25, collage on Division is hosting a Bead Sparkle book party for me! Please come by between 2 and 5 pm to make this FREE project – the Sparkle Jar Pendant! You get to choose a little jar from a few different sizes and styles, pick out sequins from a rainbow of colors, and I’ll teach you the wire wrap to turn it into a pretty pendant on a gold chain, so you can wear it home! This is a kid-friendly project (but parents will probably need to help with the pliers) and one of my absolute favorites.

The Bead Sparkle sparkle jar pendant at Collage! - west coast crafty

Collage is such an amazing store. If you haven’t been, they have art and craft supplies of all kinds – everything from vintage buttons and ephemera to embroidery supplies, fabric dyes and paints, and a exceptionally good jewelry-making section. I found so many of my materials for the Bead Sparkle projects here – it’s an inspiring and lovely place! The newest store, on Division St., has tons of natural light and lots of space to browse.

Collage on Division St, Bead Sparkle party - west coast crafty

Yesterday I chose six colors from the Doodlebug Designs line of sequins for everyone to use: tangerine, cupcake, bumblebee, limeade, swimming pool (the one I used for my book pendant pictured above), and lilac. Each of the colors has six different shades mixed in – light and dark hues in matte, clear, and opalescent. They sparkle and shimmer and move as you wear the pendant, for a beautiful effect!

Six colors of sequins for Bead Sparkle! - west coast crafty

I’m a bit of a less-is-more when it comes to design sometimes, so I loved using just one color (my favorite – swimming pool) in my pendant, but with six color ranges of sequins to play with, Pearl and I had a lot of fun making a few more jars last night. She mixed jewel tones of red and purple, a bigger mix of aqua, blue, and green, and then a pretty pink/yellow/orange mix that feels like spring. You can see that leaving space in the jar, or filling it closer to the top, adds a different feeling too. And as I mentioned before, I love how much the color and light shifts as you move; the six shades within each color range play so nicely together with the others!

Pearl's Sparkle Jars from Bead Sparkle - west coast crafty

I’ll also be signing copies of Bead Sparkle so you can bring one home to keep on making tons more jewelry and accessories – there are 120 projects in the book! We’ll have a special display of lots of the other ones I made, paired with the supplies I bought at Collage (like glass, metal, washi tape, charms, and jewelry-making findings) so you can get started on your next idea right away. This is my early author copy, with all the pages of Collage projects marked, so we could choose a fun one for the make and take party!

Bead Sparkle with Collage projects marked - west coast crafty

I hope to see you (and your friends, or your kids, or both!) on Sunday!

If you go:

Bead Sparkle party at Collage

3701 SE Division St., Portland, OR 97202

Sunday, September 25 from 2-5 pm – and it’s free!


Save

Save

Save

Save

Save

Save

introducing bead sparkle! September 9, 2016

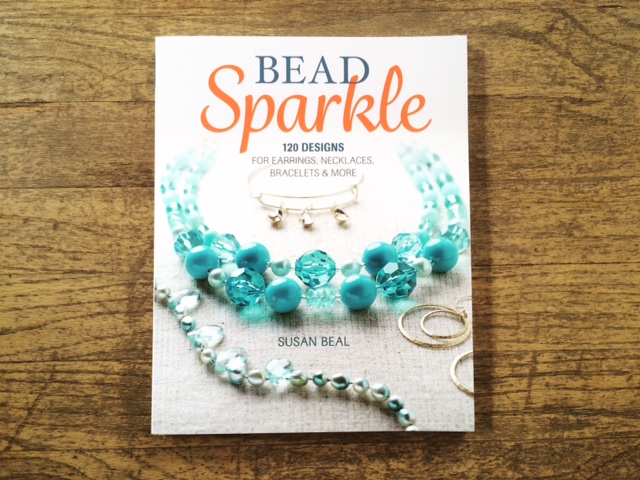
I’m so excited to announce my new book, Bead Sparkle! It includes 120 jewelry and accessories projects to make, using all the things I really love – vintage bits and pieces, semi-precious stones, glass, wood, metal, pearls, crystals, broken jewelry, family treasures, charms, washi tape, fabric, pearl cotton, buttons, silk flowers, and really, just about anything else you can wire-wrap, glue, or stitch. The 40 projects, which each have 3 spin-off variations, are accessible enough for beginners to try with confidence, but I really encourage you to use the step-by-step tutorials as a starting point: create pieces in your own style, mixing vintage, new, found, and unexpected treasures for your very own unique jewelry.

And to celebrate, I’d love to give away a signed book paired with a special hand-picked collection of vintage beads, buttons, charms, and ephemera in your favorite colors and styles! Please read on for all the details!

Bead Sparkle! by Susan Beal - westcoastcrafty.com

Ten years ago I wrote a jewelry-making book called Bead Simple. I poured my heart into that book, designing 110 projects myself and asking 40 of my favorite designers to each contribute a guest piece as well. It came out in March 2008, just a couple months before my daughter Pearl was born, and now she’s in third grade! Over the years, it’s gone into new printings, spun off craft booklets, and a friend even spotted it on his trip to Thailand a few months ago. I feel very lucky to try my hand at a sequel all these years later, this time focusing on the extra-special pieces that add a little sparkle to your life, whether it’s a quick accessory to brighten up a Tuesday morning heading to work, or making something pretty to wear to a New Year’s Eve party with a new dress.

Bead Simple + Bead Sparkle - westcoastcrafty.com

The same amazing illustrator from my last six books, Alexis Hartman, updated her beautiful watercolor technique illustrations for this new collection, as well as creating new ones. Her work is just gorgeous and I am so happy to have her contribute again!

Bead Sparkle techniques - westcoastcrafty.com

For the projects, I went in lots of fresh directions – there are so many amazing materials available now, it will make your head spin. Timeless techniques like beading, wirework, and knotting play nicely with cross-stitch, botanicals, painting, glass, paper, collage, and embellishments. I got to make a few pretty things with my favorite Pendleton wool and Cotton + Steel and Denyse Schmidt fabrics! And I took one of my most favorite approaches to designing, vintage gone modern, and turned it into a stand-alone 3-project section at the end of every chapter, from necklaces and pendants to earrings and accessories.

Bead Sparkle projects - westcoastcrafty.com

This time, I asked a few of my favorite designers to each contribute two designs – so you’ll see gorgeous pieces from Kayte Terry, Christina Batch-Lee, Torie Nguyen, Cathy Zwicker, Michelle Freedman, and Lynzee Lynx Malsin.

Bead Sparkle necklaces - westcoastcrafty.com

Here are a few of the pieces in the book!

Bead Sparkle pendants - westcoastcrafty.com

And a few more…

Bead Sparkle bracelets - westcoastcrafty.com

And more…

Bead Sparkle - bracelets and more - westcoastcrafty.com

And a few more!

Bead Sparkle accessories - westcoastcrafty.com

My first Bead Simple event is coming up on Sunday, September 25, from 2-5 pm at the Division St. location of collage. Please come by anytime to make your own Sparkle Jar Pendant to take home, and get your book signed! It’s a free make and take, and you can choose from all kinds of sparkly things to spotlight inside your little pendant jar – sequins, beads, buttons, sand, tiny treasures, and more. It’s beginner- and kid-friendly and you’ll leave with not just a pretty piece of jewelry, but a super-handy wirework technique to use in your next project! More details on this, and a few more events, soon!

Bead Sparkle - sparkle jar pendant at Collage! - westcoastcrafty.com

Now, on to the Bead Sparkle giveaway! Please leave a comment here on this post, sharing your favorite piece of jewelry – whether it’s something you made, a family piece, a special gift, or just something cool. I’d love to hear a bit about it, the best things always have a story behind them! Please comment on this post by next Friday, September 16 at noon Pacific time, and I’ll draw a winner, ask for your favorite colors and styles, and put together a special package for you from all my vintage and new stuff! Here are just a few of the pieces I used in the book projects, to give you an idea…

Bead Sparkle - vintage ephemera - westcoastcrafty.com

You can find Bead Sparkle at Collage, Powell’s, Amazon, Barnes & Noble, Dava Bead, or your favorite local bookstore. Thank you to everyone who’s had kind words for my book – I can’t tell you how much I appreciate it!

Bead Sparkle back cover - westcoastcrafty.com

Love, Susan


UPDATE: Thank you for the wonderful comments about your favorite pieces of jewelry! I love them. I drew a winner on Friday night, and will be in touch to send the hand-picked vintage and new supplies… Elisa won!

So beautiful, I would love to get back into beading… I’ve taken a bit of a hiatus to play with fabric. I like the idea of combining the two. Oh, my favorite piece, I forgot!!! It was a necklace gifted to me by the ladies I worked with at a bead store on my last day. Shades of green and turquoise with silver. However, it was stolen with all the rest of my jewelry a couple years ago.

Save

Save

Save

Save

Save

Save

sheep to shawl, February 7! February 2, 2016

It’s been a busy few months of building our ADU and working on a LOT of non-craft projects, but I’m so excited that I’ll be speaking at a lovely event honoring Pendleton Woolen Mills this weekend, and sharing projects from my book in partnership with them, Hand-Stitched Home! If you’re local, I hope to see you there!

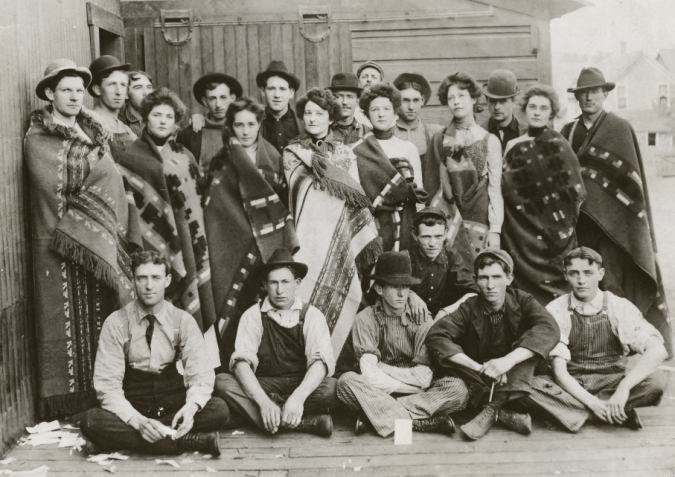
early workers - Pendleton Woolen Mills

historic images courtesy of Pendleton Woolen Mills

I was invited to speak at Lake Oswego Reads, a wonderful month-long series of book and art events the city puts on each year. This year focuses on the Native American heritage and history of Oregon and the West, and Pendleton is showing a collection of their beautiful Native American Trade Blankets in the library during the festival. Here’s my official event description:

Join author Susan Beal to learn the fascinating history of Oregon’s own treasure Pendleton Woolen Mills, and get inspired to do your own sewing and quilting with wool with her book in partnership with Pendleton, Hand-Stitched Home! Susan will share a slideshow of beautiful archival photos from the company’s century of history; stunning jacquard, solid, and plaid fabrics; and lots of projects from her book, from wool shawls and scarves to quilts and blankets.

The Pendleton Woolen Mill Store is generously offering a gift bag for attendees.


Pendleton 49er jacket - Pendleton Woolen Mills

historic images courtesy of Pendleton Woolen Mills

I’ll be giving my “Sheep to Shawl” talk on the history of Pendleton, with a slideshow of archival photographs, advertisements, and ephemera from their vast archives – you can see some of these beautiful things as part of the historical timeline in Hand-Stitched Home! But I’m excited to share much more of the richness and detail on Sunday… if you love Pendleton, or fine fabrics, or American history, their story is so captivating.

folded fabrics

I’ll also get to share dozens of their stunning fabrics, from the first Indian trade blanket jacquards to the colorful, crisp plaids the Beach Boys made an iconic part of music history – many still in the line today.

improvisational quilt

And I’m bringing my favorite book projects from Hand-Stitched Home, too, like my Improvisational Wool Quilts and Picnic Blanket. If you’ve ever wanted to get any of my books signed, the library will have them for sale!

picnic blanket

And just as mentioned above, the Pendleton Woolen Mill Store is graciously offering each Sheep to Shawl attendee a gift bag to take home with them. Thank you so much!

I hope to see you there! It’s this Sunday, February 7, happening several hours before you’ll need to get to your Super Bowl (or Puppy Bowl) Party, in the beautiful Lake Oswego Library (details below).

If you go:

Sheep to Shawl, a history of Pendleton Woolen Mills

Sunday, February 7, 1:30 pm

Lake Oswego Library, 706 4th St., Lake Oswego, Oregon

LakeOswegoReads.org // 503-675-2538


Log Cabin 101 – back to school blog hop September 11, 2015

I’m today’s stop on Sam Hunter‘s wonderful Back to School Blog Hop, which is covering all kinds of sewing and quilting techniques and ideas, and I’d love to share some quick tips for sewing log cabin blocks! They’re one of my all-time favorite patterns – easy, quick, graphic, endlessly customizable, perfect for using up scraps, and beautifully simple. No angles, no complicated piecing, just beginner-friendly straight-line sewing and you’re on your way.

Modern Log Cabin Quilting for Barnes & Noble

I was lucky to write a whole book of log cabin quilts and patchwork projects, Modern Log Cabin Quilting, four years ago, and Barnes & Noble recently published a brand-new edition with cover flaps and some other bells and whistles for just $9.98! My cousin, Alexis Hartman, illustrated it beautifully, and I’d love to share some of her super-clear diagrams today to get you started on your first (or hundred and first) log cabin block.

Log cabin always starts with a center square – though really, it could be rectangular or wonky or anything you like – with strips of fabric, or “logs” pieced around it, one by one. Traditional log cabin blocks use a smaller center square (often red or yellow, to symbolize the hearth or the light in the home), while some modern blocks expand the center proportions to be more of a major design element. Here you can see my center is slightly larger – not huge, but big enough to catch your eye in the design, and spotlight a print or element you might like best.

Log Cabin Block DiagramI like to piece my log cabin blocks clockwise. You are certainly free to piece in either direction, but when I show you the back of this block in a minute I’ll explain a bit more about why I like what I like! So, for this block, I add my log 1 above the center, using a 1/4″ seam allowance, and trimming the ends of the strip flush and finger-pressing as I go (what my PMQG friend Heather calls “snip & flip”). MLCQ has detailed diagrams of how to add the logs one by one, so please refer to that for more specific step-by-step instructions, but here you can see that moving clockwise around the block, you add log 2 to both the center square and the end of log 1. Rotate your block a quarter-turn and add log 3 the same way, then log 4. You’ve finished your first tier of logs, a mini-block in itself! At this point, I like to press my block back and then front with a steam iron, and trim any uneven areas neat and straight.

To continue, add log 5 to the side with the shortest log (1), and continue working in the same direction to add logs 6, 7, & 8. When you’re happy with the size of your block, press it back and front and trim it square with a quilting ruler and rotary cutter. Here’s a quick look at the back, which I always think is helpful to see.

Log Cabin Block BackAs you can see above, when piecing clockwise, your seams naturally align outward, away from the center, so finger-pressing or ironing them is very easy – just smooth out from the central square and they’ll lie flat and neat. If you piece counter-clockwise, you’ll find your seams naturally aligning inward, over the center square – and I find that a lot tighter and harder to press. So it’s really up to you which direction you choose to piece – just be consistent in your method and your block will look awesome!

You’ve learned the basics of building the block, so now it’s time for the fun part – choosing the colors, prints, proportions, arrangements, and settings that make your patchwork yours. I could go on and on about this because it’s so much fun, but I was so lucky to teach a series of four of my favorite log cabin quilting projects with Creativebug, and I’d love to share a bit more from that here – this little trailer captures so much of what I love about log cabin and really every kind of quilting, from choosing fabrics to planning your design and piecing it into a beautiful whole.

Here are four class projects I teach with Creativebug that show just some of the range you can achieve – a simple oversized center square pillow alternating solids and prints, a traditional-turned modern baby quilt with pops of color mixed into the “light and dark” configurations in a Barn Raising setting, a jelly-roll-friendly Modern Crosses (yes, those crosses are made of mini log cabin blocks) table runner or wall quilt, and a truly one-of-a-kind wonky quartered-log cabin tote bag… no two are ever alike! You can take any of these in your own direction following my templates and make your own beautiful projects your own.

Log Cabin Quilting on Creativebug

If you’d like to take a deeper dive into designing and piecing blocks your way, I’d love to have you try my Log Cabin Quilting classes! Creativebug is offering an amazing special – if you sign up for their monthly subscription, which offers unlimited access to more than 500 classes, the first 2 weeks are absolutely free, no strings attached. I subscribed to to Creativebug for years before I taught with them and I love the range of craft classes they offer! The subscription is just $4.95 a month after the free trial, and they add new classes every week. It’s a really great deal and endlessly inspiring – lots of sewing and quilting classes in there with more on the horizon.

If you’re in Portland, I’m very excited that I’m showing two of my log cabin quilts at the NW Quilting Expo as part of the Portland Modern Quilt Guild special exhibit this month! My Barn Raising Baby Quilt (above) and my Harvest Gold Charm Bracelet from Scraps, Inc (below) will be hanging with almost 50 of my guildmates’ quilts. Yes, this “bracelet” pattern is all log cabin blocks with oversized charm square centers, weighted and rotated to give the illusion of a curve with all straight-line piecing. It’s one of my favorites and I’m so thrilled that it will be part of this beautiful show!

Harvest Gold Charm Bracelet

NW Quilting Expo is September 24, 25, & 26 and I’ll be there signing copies of Hand-Stitched Home and Modern Log Cabin Quilting – please come say hi if you have any log cabin questions and I’d love to chat about it then. I’ll have times and specifics soon and will update the post then, and share on Instagram too.

The Back to School Blog hop kicked off on September 1 and runs through the entire month, and a little of October too as there’s just so much great info to share! Hop along with some of our industry’s pros to get tips and tricks for your quilting and sewing studio.

Sept 1: Peta Minerof-Bartos of PetaQuilts – So, Does that Diagonal Method for a Pieced Backing Really Work

Sept 2: Cheryl Sleboda of Muppin.com – The Quilter’s Knot

Sept 3: Teresa Coates of Crinkle Dreams – The Importance of Pressing

Sept 4: Cath Hall of Wombat Quilts – Color Coding for Paper-piecing

Sept 5: Sam Hunter of Hunter’s Design Studio – How to Calculate and Cut Bias Binding

Sept 6: Melanie McNeil of Catbird Quilt Studio – Credit where Credit is Due

Sept 7: Mandy Leins of Mandalei Quilts – How to Keep a Perfect 1/4” Seam Between Different Machines

Sept 8: Rose Hughes of Rose Hughes – Fast Pieced Applique

Sept 9: Megan Dougherty of The Bitchy Stitcher – The Care and Feeding of the Domestic Sewing Machine

Sept 10: Lynn Krawczyk of Smudged Design Studio – Make a Mobile Art Kit

Sept 11: Susan Beal of West Coast Crafty – Log Cabin 101

Sept 12: Sarah Lawson of Sew Sweetness – Zipper Tips

Sept 13: Jane Victoria of Jolly and Delilah – Matching Seams

Sept 14: Jemelia Hilfiger of JemJam – Garment Making Tips and Tricks

Sept 15: Ebony Love of LoveBug Studios – Curved Piecing Without Pins

Sept 16: Misty Cole of Daily Design Wall – Types of Basting

Sept 17: Kim Lapacek of Persimon Dreams – Setting your Seams

Sept 18: Christina Cameli of A Few Scraps – Joining Quilted Pieces by Machine

Sept 19: Bill Volckening of WonkyWorld – The Importance of Labels

Sept 20: Jessica Darling of Jessica Darling – How to Make a Quilt Back

Sept 21: Debbie Kleve Birkebile of Mountain Trail Quilt Treasures – Perfectly Sized No-Wave Quilt Borders

Sept 22: Heather Kinion of Heather K is a Quilter – Baby Quilts for Baby Steps

Sept 23: Michelle Freedman of Design Camp PDX – TNT: Thread, Needle, Tension

Sept 24: Kathy Mathews of Chicago Now Quilting Sewing Creation – Button Holes

Sept 25: Jane Shallala Davidson of Quilt Jane – Corner Triangle Methods

Sept 27: Cristy Fincher of Purple Daisies Quilting – The Power of Glue Basting

Sept 28: Catherine Redford of Catherine Redford – Change the Needle!

Sept 29: Amalia Teresa Parra Morusiewicz of Fun From A to Z – French Knots, – ooh la la!

Sept 30: Victoria Findlay Wolfe of Victoria Findlay Wolfe Quilts – How to Align Your Fabrics for Dog Ears

October 1: Tracy Mooney of 3LittleBrds – Teaching Kiddos to Sew on a Sewing Machine

October 2: Trish Frankland, guest posting on Persimon Dreams – The Straight Stitch Throat Plate

October 3: Flaun Cline of I Plead Quilty – Lining Strips Up


a dropcloth interview + a color wheel sampler giveaway! August 5, 2015

I have always loved embroidery, since I learned hand-sewing as a little kid and made up my own fun projects for my dolls. But recently, with young children of my own, beautiful, portable hand-stitching projects I can easily pick up, and just as quickly put down, have been a real creative joy for me… and much more realistic than hours of solo machine sewing (someday!). I was so lucky to get a review copy of Rebecca Ringquist‘s gorgeous new book, and after I met her at her lovely Collage event this spring, I’ve spent the last few months stitching away on a few of her samplers and taking lots of inspiration from her generous, wonderful work. Rebecca’s ability to blend vintage and antique pieces with her own very modern approach, in fascinating layers, speaks to so much of what I love about craft. The chance to create beauty without the pressure of perfection is so freeing.

Embroidery Workshops

This is the sampler that comes tucked in the back of the book – so cool! I kept my pearl cotton colors for this one in a sunny summer palette and mixed in some gold floss as well. It’s been a perfect summer project, worked at a fun and intermittent pace, while I’ve finished two of her other samplers to the last stitch.

IMG_0320

Rebecca’s book combines instructions for basic and intermediate embroidery stitches with colorful photos and hand-drawn illustrations of her own work. Her style and approach are just delightful. This book will not only teach you how to stitch – whether you’re a beginner or a longtime embroiderer who could use a fun refresh – but will also inspire you to love your stitches and what you can build them into.

IMG_7279

my pearl cottons in a vintage sewing case from Knittn Kitten

Rebecca kindly agreed to an interview with me about her work – and offered up a very generous giveaway of one of my favorites of her samplers! (See below to enter.) Thanks so much, Rebecca!

Shoeboxes of thread-7349

Some of Rebecca’s green and orange flosses and threads

How do you organize your pearl cotton, floss, and embroidery supplies?
I keep my embroidery threads in clear boxes, sorted by color.  They are (for the most part) the plastic shoe boxes from the container store.  Here’s a link.     I keep scissors, markers, rulers,  paintbrushes, etc. in old tins.

Tins of tools-7393

Scissors and other tools in Rebecca’s studio

Do you have a favorite stitch these days?
I’m a little shy to say that my favorite stitch is, and probably always has been the back stitch.  It is the most versatile, the most similar to a simple drawn line.  I use it constantly.  Second favorites are the running stitch and couching.

Paisley (1 of 1)One of Rebecca’s favorite Paisley samplers – the humble back stitch beautifully connects the more complex stitches!

I love how distinctive each of your samplers are, like the color wheel with its beautiful circular pattern divided into 12 colorful sections, each with its own stitch. What inspires you to create a new design?
I have a big collection of vintage books, and in particular, I’ve been looking at vintage textile pattern books lately while I work on new designs.  I spend a lot of time doodling, and these days, I’m having most fun doodling with gouache and paintbrushes.  From lots of bad designs that go in the trash come the ideas and beginnings of new designs and samplers. My favorite sampler so far is Paisley – I love how dense the stitches are, and how colorful the embroidery ends up.  I get a little thrill when a new version pops up with the hashtag on Instagram (#dropclothsamplers)

color wheel-9063Rebecca’s take on her gorgeous Color Wheel sampler!

 I bought a Color Wheel sampler at Rebecca’s event at Collage, and have just loved working on it. I finished the edging and perimeters of mine with single strand back stitch in gold floss, and thought the effect was subtle, but gorgeous. There are so many ways to personalize such a bold and graphic design, and choosing the twelve colors is a lot of fun too!

IMG_7412my Color Wheel sampler, just after I finished and signed it! Love this project.

Rebecca has graciously offered up my favorite of her samplers as a giveaway prize to one of my readers, a Color Wheel sampler ready for you to stitch! To enter, please leave a comment here on this post, mentioning something you love about embroidery, or how you learned, or anything else fun that comes to mind. I’d love to see your work if you’d like to share, or link to someone else’s that inspires you. Please comment by midnight Pacific time Wednesday, August 12, one week from today. Good luck!!

Want to see more of Rebecca’s work?

Here’s her book at Powell’s – or of course you can find it in her shop or at your local bookstore.

• She teaches a wonderful Creativebug class in embroidery, too!

• Find her samplers in her Etsy shop here.

• And her Instagram is super fun to follow, don’t miss the #dropclothsamplers tag to see lots more of her pieces brought to life! Now that she’s living in Portland, she’s sharing some beautiful photos of my favorite city, which has been so nice too. I’m excited to cross paths sometime soon!

IMG_6803The embroidery piece Pearl & I started and collaborated on at Rebecca’s Collage event – she drew, I stitched!