


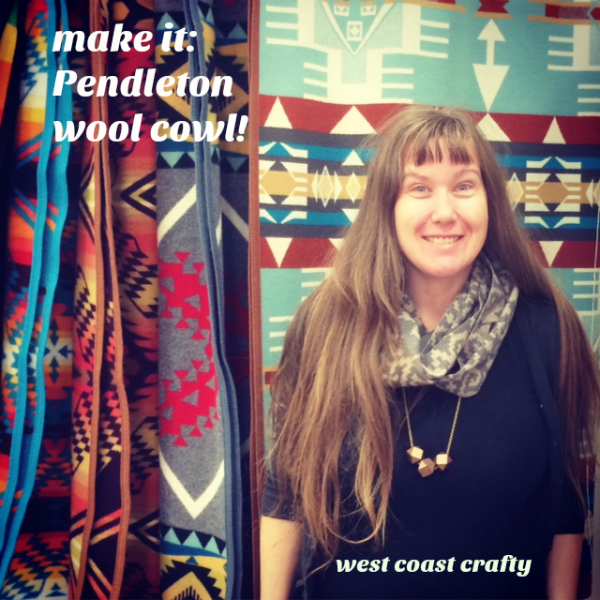
make it: Pendleton wool cowl! September 29, 2016
I love the Pendleton Woolen Mill Store, and after I visited yesterday and bought some new treasures, I wanted to share a free and beginner-friendly sewing tutorial: make your own cozy cowl from soft, beautiful Pendleton wool fabric! I’ve been wearing the one in the photo for the last year, on chilly mornings that slowly warm up, or tucked into a real coat on cold days as a perfect layer. It’s light, easy to wear, and feels amazing on. And this project uses less than a quarter-yard of your favorite jacquard, plaid, or solid lightweight wool, and you can sew it in a couple of minutes (okay, a little longer if you take some time to choose just the right decorative stitch on your machine, or need to wind a bobbin…).
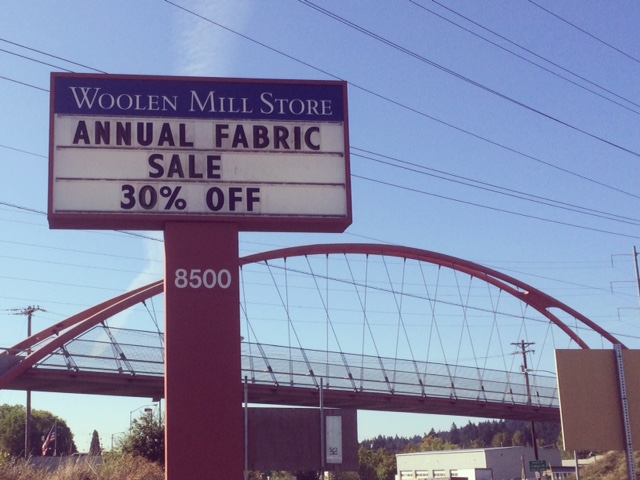
Every September the WMS has a huge sale – 30% off all fabric, plus lots of other good discounts. It’s going through 9/30, so if you can stop in in person, or call for mail order (866-855-9285), you can get an amazing deal on all the jacquard fabrics I used! My cowl uses an 8″ wide edge-to-edge cut (actually, a tear, since Pendleton wool is woven so precisely, it tears a perfectly straight edge along a clean grainline), so at .22 of a yard, it’s a very economical project, sale or not. Oh, and feel free to change the width – 6″ wide would make a narrower but striking cowl, 10″ would make a more sturdy version. This is a super-flexible project, and it doubles around your neck, so you see a lot of the pattern or color when you wear it.
I chose a mix of different jacquards (the vivid, beautiful trade blanket patterns), each around $64/yard, but I included a favorite plaid of mine in this stack as an example of some of the other apparel-weight fabrics you could choose at around $34/yard. (Some quick math: at 8 inches/.22 yard, that’s $14 regular price, $9.85 September sale price, or $7.50 regular price, $5.25 sale price, to make one cowl. A lot of cozy luxury for a small investment in fine fabric!) You can also use a nice piece of any other lightweight wool you have, but make sure it’s measuring at or near 60″ wide, which is the edge-to-edge length on most Pendleton wool fabric sold off the roll. This is what I bought today.

- So, you have your beautiful, soft wool fabric, measuring 8″ x 60″ – now what? Make one twist in the fabric to create a Mobius strip, and then pin your selvedge edges neatly together, overlapping them by about 1/2″. You’ll see that the pattern on a jacquard will show the opposite colorway when it’s been flipped – a beautiful contrast. (You can also skip the flip if you prefer, but I like how it gives the finished cowl a visual mix of pattern colors, not to mention the coziness of curving and curling around you, instead of hanging in layers perfectly straight, as you wear it.
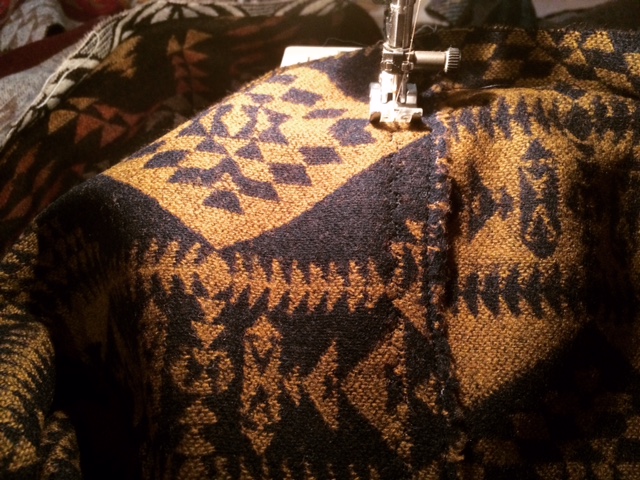
Here’s a close-up of how the selvedges look pinned, with the twist to the right. Pendleton selvedges are so nicely finished that there’s no need to cover them, you’ll just stitch the cowl with two clean, simple parallel seams.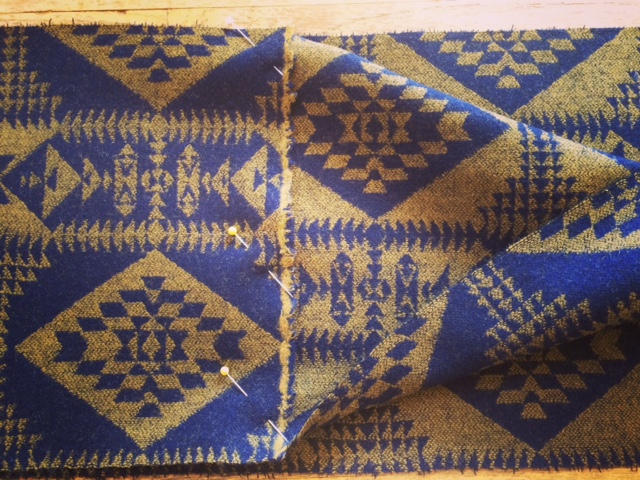
2. First, stitch along the pinned selvedge with a straight stitch, back-stitching at the beginning and end of the seam to hold it securely. This is a reinforcing, durable stitch, nothing fancy, to join the ends together neatly.
3. Now, you’ll secure the other edge of your 1/2″ overlap with a decorative stitch (I was inspired by Lupine Swanson‘s beautiful, simple shawl from my Pendleton sewing book Hand-Stitched Home and her gorgeous decorative stitching – another awesome and super beginner-friendly project!). But you can also use another simple straight stitch if you like, or your machine is more straightforward. You can sew this with either side facing up; either flip it over, or stitch on the same side, parallel to the first seam. Essentially, you just need to catch the other selvedge neatly, and add some style there if you like. The below photo shows my finished seam, but with the needle in the right spot, so you can see it’s running parallel to the first straight stitches. This whole process should take you about 1/10 the time it does to read this paragraph!
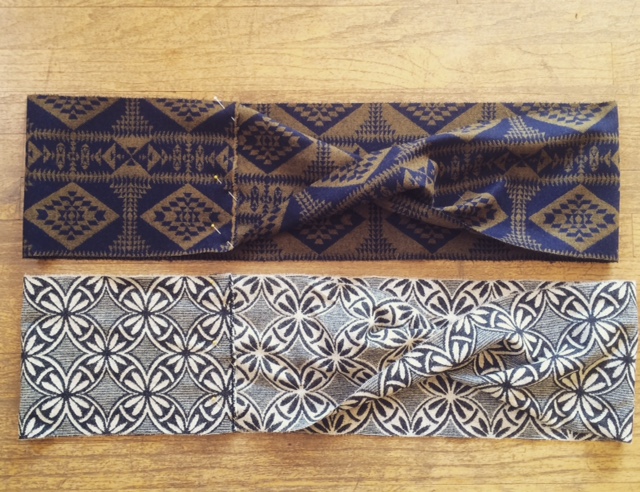
Here are four of the cowls and their seams for comparison: I used compatible thread colors, so the decorative stitches aren’t as obvious, but the top cowl is 2 straight stitches, and the others are different Pfaff ClassicQuilt stitch options (asteriks, leaves, and geometrics). They really do look nice close-up, if you’re into details!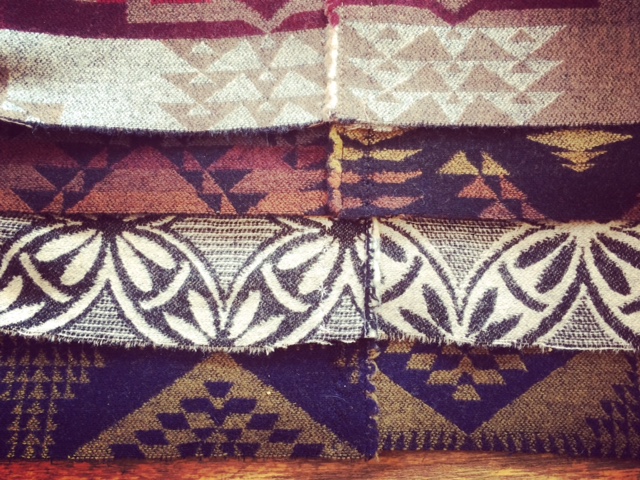
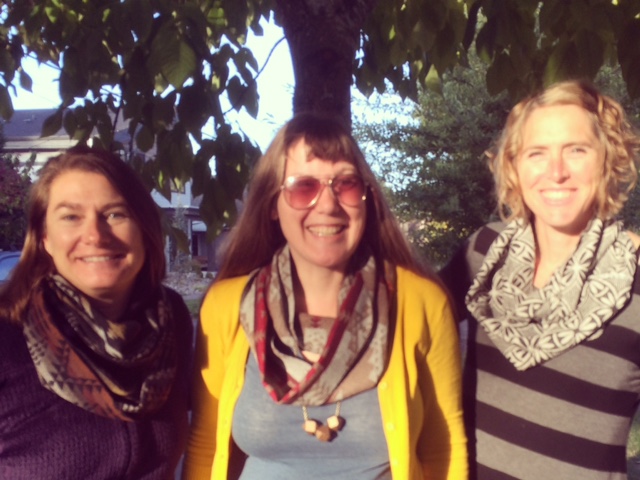
And here are some of the cowls in action, thanks to Abby and Tracy taking an extra minute at the bus stop this morning! Please let me know if you have any questions and I’d love to see your cowls if you sew one – leave me a comment or tag me on Instagram or wherever you share a photo!
Leave your comment to Cancel Reply