


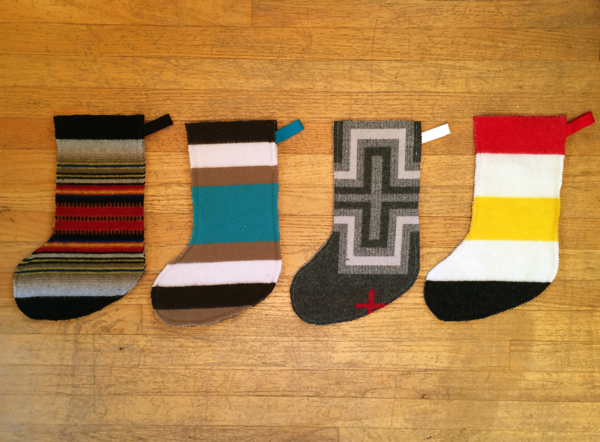
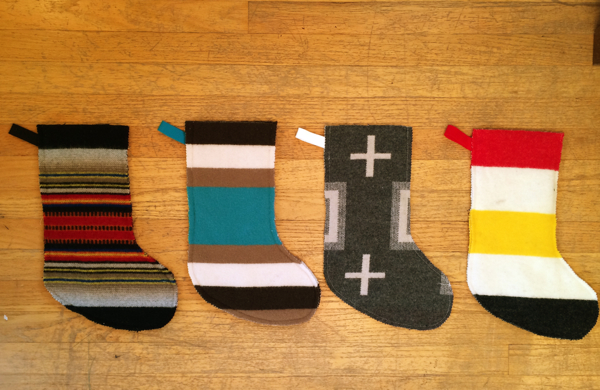
make it: wool Christmas stockings! December 18, 2014
I sewed these stockings from remnants of some of my favorite Pendleton wools last year but didn’t have a chance to put a tutorial together until now. These are super fast to sew and very beginner-friendly, but you could customize them with any cool applique, needle-felted, or embroidery embellishment, too. Michelle even made me a real downloadable stocking pattern (thank you, Michelle!!!), so here you go… my wool Christmas stockings!
You’ll need (for one stocking):
•16” x 24” remnant of wool fabric (I used a variety of wool fabric weights in my four stockings) – or two different 16” x 12″ pieces for a reversible stocking
•8” wool felt binding or ribbon
•Downloadable stocking pattern!
•Sewing machine, scissors, thread, pins, pinking shears if you have them
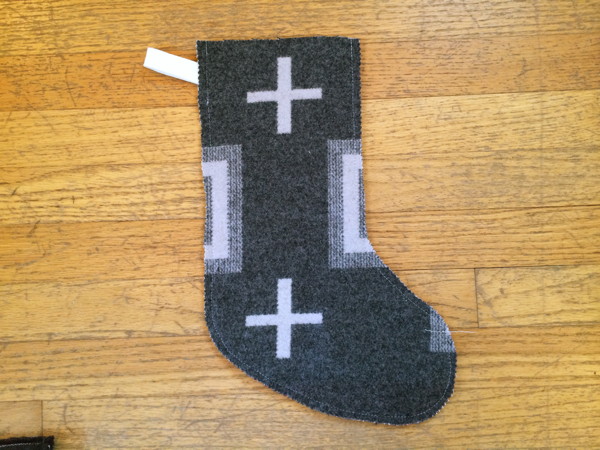
1. Download, enlarge, print, & cut out the stocking pattern. I actually freehand-drew mine on newspaper, before Michelle made the beautiful professional version, so for reference the finished stocking is about 14” tall and about 9″ wide at its biggest.
2. Cut the wool fabric into two pieces, approximately 16″ x 12,” and arrange the two layers so any stripes or other fabric designs are aligned. Pin the stocking pattern to both pieces of the wool fabric and cut it out with sharp fabric scissors. Optional, but looks cool: trim both the stocking layers closely with pinking shears all around the sides and bottom, leaving the top plain.
Now is the time to embellish one or both sides any way you like – initials, names, designs, fanciness!

3. Pin the two layers of the stocking together around the perimeter, again carefully matching any stripes or designs. Double your 8” ribbon or wool felt binding into a loop (I cut my 1.5” wool felt binding in half longways so it was 3/4” wide, but you can use anything you like for your loop) and tuck the raw edges of it in between the stocking layers at the marked spot on the upper right hand side.
4. Using a 3/8” seam allowance (and if your fabric is thick, a longer stitch length), sew around the perimeter of the stocking, back-stitching at the beginning and end of the seam for security. Leave the top section open, of course!
That’s it! Let me know if you sew any of these, I would love to see them.
Thanks to everyone who tuned into my episode of American Patchwork & Quilting Radio with the lovely Pat Sloan – it’s now available to listen to in her archives! It’s the December 15, 2014 show, and I’m on 4th – we chatted about Hand-Stitched Home and sewing with wool, and I got to share some of my favorite tips.
Leave a Reply