


make it: holiday snowglobes December 21, 2011
My friend Maggie posted inspiration photos of some pretty holiday snowglobes she saw at Anthropologie a few weeks ago, and she made some gorgeous ones for gifts. I fell in love with the idea too, and when the stars finally aligned yesterday afternoon, I got out my hot glue gun, glitter, and Mason jars and made these little winter wonderland holiday snowglobes!
I wrote up a simple tutorial, but you can also check out these great ones from Bonnin Designs and Beautiful Journey (update: and Wise Craft’s gorgeous salt shakers). I also made these plastic drink-cup “terrarium” versions last year, if you have those around instead of jars… they’re really fun to make too.
You’ll need:
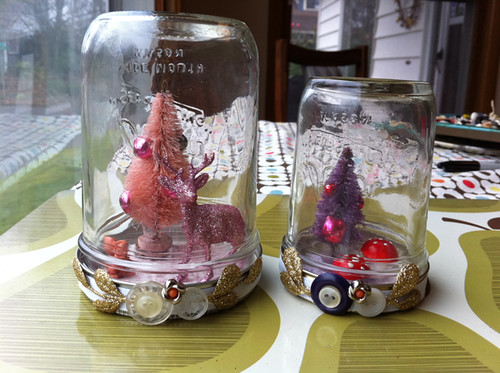
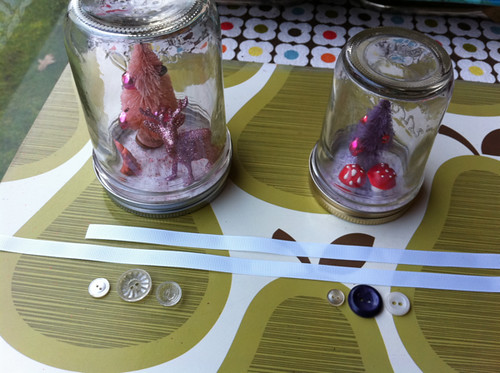
-Mason jars with lids – I used a wide-mouth pint for my pink one and a half-pint for my red and purple one. Pearl’s (below) is a wide-mouth half-pint.
-Quilt batting remnant
-Scissors
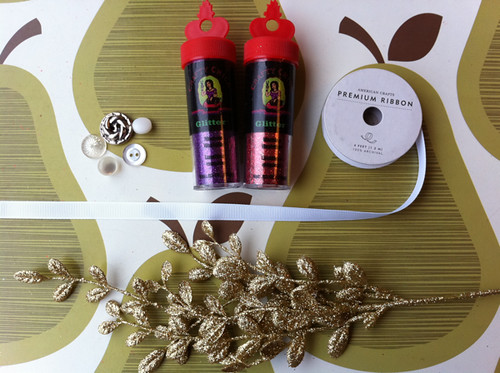
-Glitter (mine was Crafty Chica’s line)
-Hot glue gun
-Bottlebrush trees or any other decorative bits for your snowglobe scene (my trees are from Magpie Ethel, spun-cotton mushrooms are vintage, glitter reindeer is from Crafty Wonderland, squirrel is from the Decorette Shop – Pearl’s animals are all from a bag of assorted plastic toys that was a gift)
-Ribbon, buttons, + embellishments for the jar lid
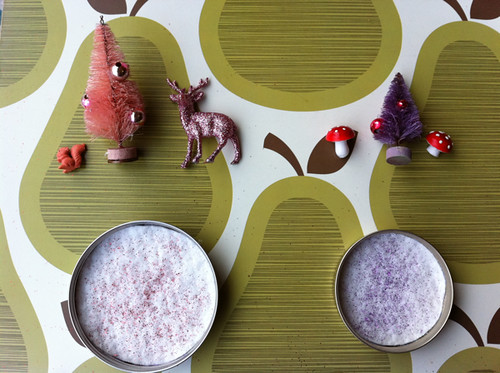
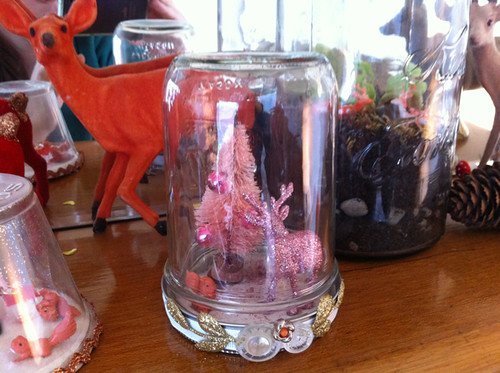
1. Trace a circle of quilt batting using the jar lid liner and cut it out. Sprinkle glitter on it and plan your little snow scene (remember, you’ll need to leave a little space on each edge for the jar sides). Hot-glue the glittered batting into the jar lid.
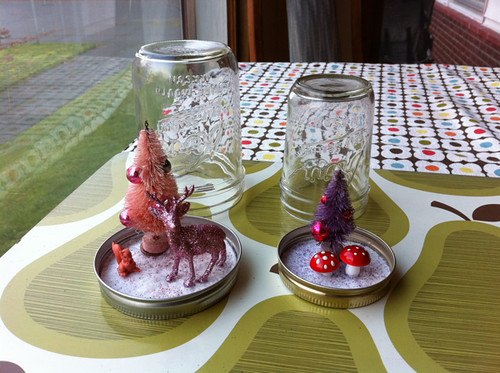
2. Hot-glue each decoration in place onto the “snow.”
3. Holding the jar-lid scene relatively still, twist the jar onto the lid, arranging it so that any label or lettering is to the back (or wherever you want it to be). Choose ribbon and buttons if you want to decorate the lid.
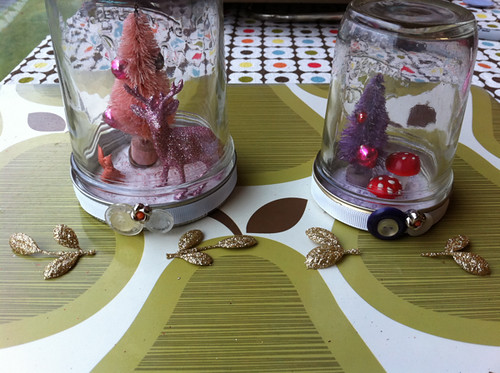
4. Hot-glue the ribbon around the jar lid, trimming it so it overlaps neatly, and then glue down a little arrangement of buttons at the front. Add little gold leaves or any other embellishments at each side if you like.
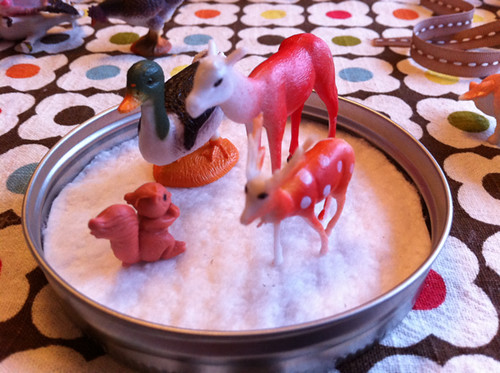
Pearl made an all-animal version once I finished mine. I have to be honest – this isn’t a super fun project to do with a 3.5-year-old, so I wouldn’t recommend it in tandem with younger kids (it’s no felt ornaments, that’s for sure). The hot glue and glass are obviously not kid-friendly so I had to keep all the good parts way out of reach and I was pretty stressed out until the last thing was glued, but she did have a lot of fun choosing and placing the animals, shaking glitter, and picking out buttons. I especially like the big one she added to the top.

Here are is the little one on the mantel…
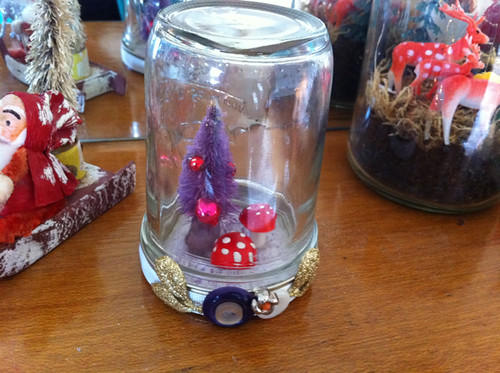
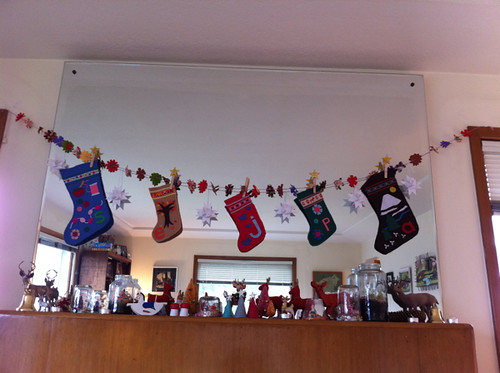
…and the bigger one on the other side. (Yes, I really like deer.)
I hung the stockings way higher this year, since Everett is after anything within his startlingly impressive arm reach, so here they are over the mantel (instead of under it like last year). Which reminds me, thank you so much to Crafternews for featuring my stockings in a round-up of favorite handmade gifts from Potter Craft authors – I really love Linda‘s.
So, that’s my annual little last-minute holiday decoration project, in the grand tradition of winter wonderland terrariums (12/22/10), stockings for Everett and my mom (12/24/10), tiny gift bags, carnelian earrings, + owl ornaments (12/17/09), and the original set of 3 stockings for me, Andrew + Pearl (12/18/08). Happy Solstice + Happy Hanukkah, everyone!
Leave your comment to Cancel Reply