


make it: log cabin patchwork tote bags February 27, 2012
I wanted to share a tutorial for making cute, simple patchwork (or patterned fabric) tote bags for kids – perfect for sending to The Littlest Warriors project over at Craft Hope, which is also the PMQG charity quilting opportunity for February. I used two 12” quilt blocks/pieces of fabric for a child’s size bag, but I included some suggestions for sizing them up for sturdier adult-size versions – plus some of my other favorite tote tutorials – at the end of the post. I hope you like them!
A quick note: I sew in a basement room without a whole lot of childcare time, and it’s February in the Pacific Northwest, so be forewarned that these photos aren’t exactly professionally lit or painstakingly staged. It’s a simple tutorial though, so hopefully you can follow along easily – I made these two tote bags in about an hour and a half, counting all the quilt block piecing! If you use stash blocks or just cut solid pieces of fabric, you can fly through these. My goal is to make 5 for the littlest warriors by the March 12 deadline – all the details are here.
You’ll need:
-Two quilt blocks (or solid pieces of fabric) in the 11”-12” square range for the outer sides of the bag. I used 12” blocks and fabric squares.
-If using quilt blocks: muslin, the same size as your blocks, or slightly bigger, for reinforcing them
-Lining fabric of your choice, the same size as your outer blocks or fabric
-1.5 yards of webbing for handles
-Thread, rotary cutter, quilt ruler + mat, scissors, iron, sewing machine
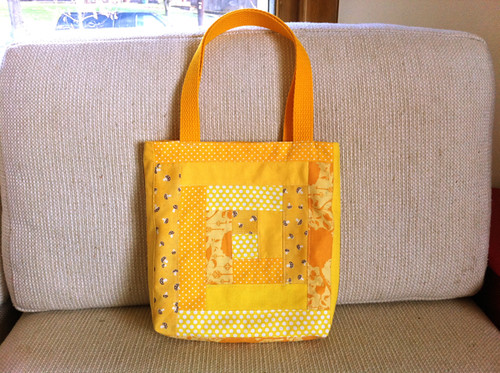
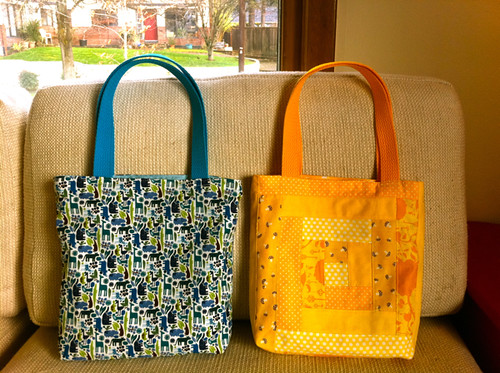
1. Cut two pieces of fabric (I used an Alexander Henry zoo print for my blue bag) or piece two quilt blocks of your choice, approximately 12” square. (You can also make them smaller or bigger if you like – 12” makes a nice toddler/preschooler-to-elementary-school size).
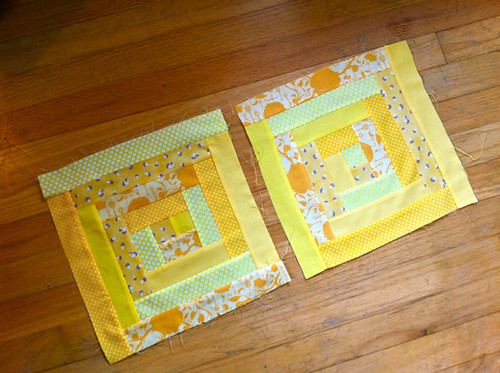
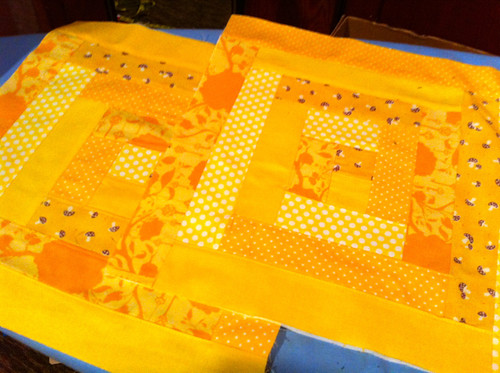
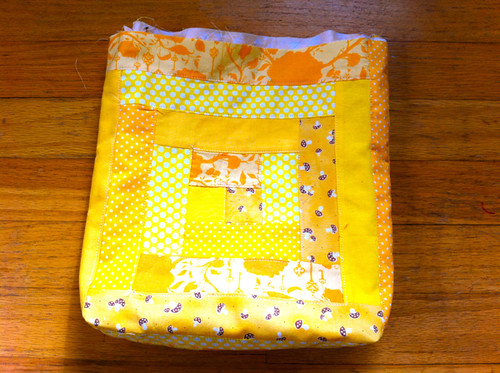
This is a great project for stash quilt blocks, or if you need to piece up two quick ones, log cabin is an easy one! I made a random log cabin block in the six yellow fabrics I originally used in my Bright Furrows quilt from MLCQ. To make two 12” blocks like these, cut 6 selvage-to-selvage (44”) strips that are 1.75” wide, in the quilting cottons of your choice. Here’s a short video of how I piece log cabin blocks…
For an approximately 12” block, you’ll start with a 1.75” center square in one of the fabrics and add 4 tiers of logs using different fabrics in any order, piecing clockwise and pressing when each tier is completed. Press front and back and square up your blocks.
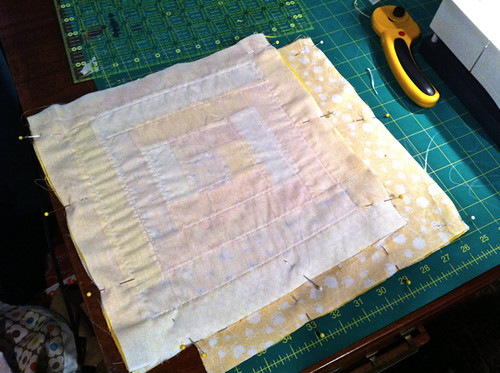
2. If you’re using quilt blocks, quilt them with a muslin backing (or use the technique of your choice) to add stability. I quilted a square outline pattern about 1/8” outside the center square and then each tier (you can see this more easily in the photo that precedes step #4). Press again and trim excess so your blocks are square. (This would also be a great project for foundation piecing/quilting as you go!)
3. Now, cut two pieces of lining fabric the same size as your blocks or outer fabrics. I used my guildmate Violet Craft’s Peacock Lane for my lining.
4. Pin the two outer pieces together around three sides, right sides facing and leaving the top open, and then repeat the same way with the lining fabrics. Stitch the three sides with a 1/2″ inch seam allowance, back-stitching at the beginning and end to hold the seam. You’ll sew the outer and lining sections together the same way.

5. Make box corners by pressing the corners into flat triangles with the seams pressed open, pinning them, and stitching 1” in from the corner. You’ll do this the same way for the outer and lining bag sections.
6. Trim the extra fabric at each corner, as shown.
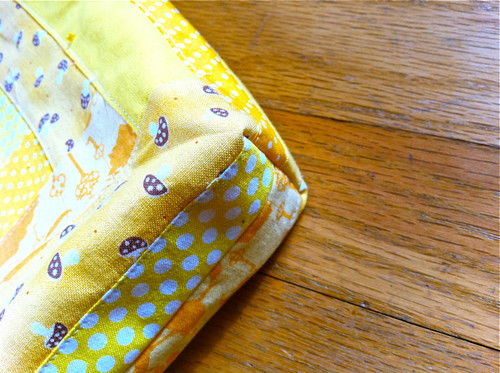
This is what your finished box corner will look like from the outside!
7. Now turn the outer bag right side out and tuck the lining in, making sure they fit snugly together. Turn the raw edges of both the bag and lining under and press them evenly (you can turn under 1/4″ to 1/2″, depending on how bulky your quilted outer section is – just keep your bag and lining consistent). Pin the bag and lining together all around the perimeter of the opening.

8. Cut two 18” lengths of webbing for handles and pin each of them in place. I placed mine 2” (patchwork) and 2.5” (wholecloth) in from the side seam – I followed the outer edge of the second tier of my log cabin blocks as a guideline for my patchwork tote, and eyed it with my wholecloth one. Just make sure they’re even with one another and match the handle on the other side, and that the handles aren’t twisted!

9. Edge-stitch around the perimeter of the bag, catching both layers evenly, and then reinforce the four handles with double-stitching.
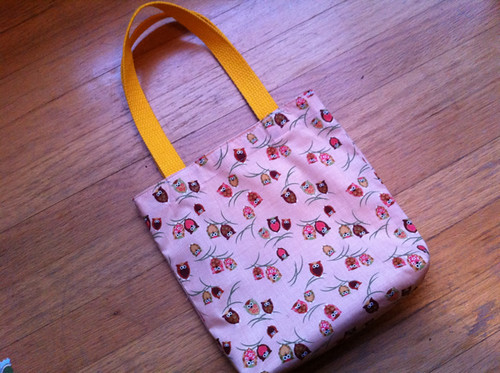
You’re done!
To make a larger/adult size, try starting with 15” or 16” quilt blocks or fabric squares (and same-size lining) instead of 11”/12”, and reinforcing the blocks with a home dec weight fabric instead of muslin. You can cut your handles to 24” each (instead of 18”), too.
Some other tutorials I like:
–The Purl Bee’s Twenty-Minute Tote (my original inspiration – an adult-sized bag without lining or box corners)
-My guildmate Monica’s adorable Pick-A-Pocket Purse (with clever outer pockets!)
–The Pink Penguin’s Lunch Bag tutorial
-And here are four other tote bags I’ve made for my own kids and their friends in this same style!
So, the March 12 deadline is two weeks from tomorrow… I would love to cheer you on if you are sewing for the littlest warriors too! Please comment or keep me posted on what you’re making, and I will be so excited to share photos of all the finished bags and hats I see. Thank you!!
Leave your comment to Cancel Reply