


make it: border print wool tote! September 19, 2014
Do you like sewing with border prints? I do! To celebrate my new wool sewing book, Hand-Stitched Home, I wanted to share a tutorial for this super-simple border print wool tote bag I made this week. I loved how it looked in beautiful Pendleton wool jacquard, with a graphic woven design at the bottom of the bag, and a serene stretch of solid navy floating above it.
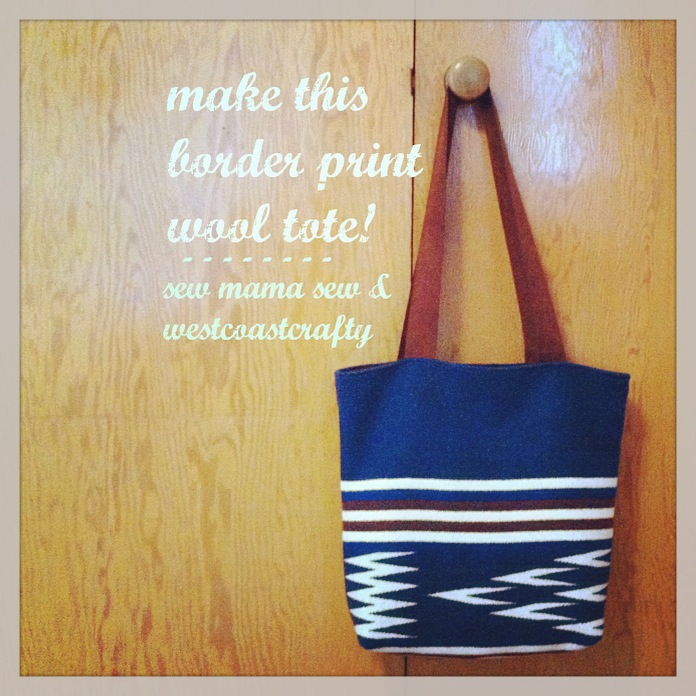
I just posted a special feature about sewing for the home with border prints over at Sew Mama Sew (the first one, last month, was a set of Cotton + Steel dresses for me and Pearl!) and shared some tips and ideas for making curtains, tea towels, or tote bags using these pretty designs. I used Pendleton wool fabric* for my tote – though of course you could use denim, corduroy, canvas, or another home dec-weight fabric that you like best! Be sure to stop by the Sew Mama Sew post for a chance to win all the fabrics and supplies I used for mine… 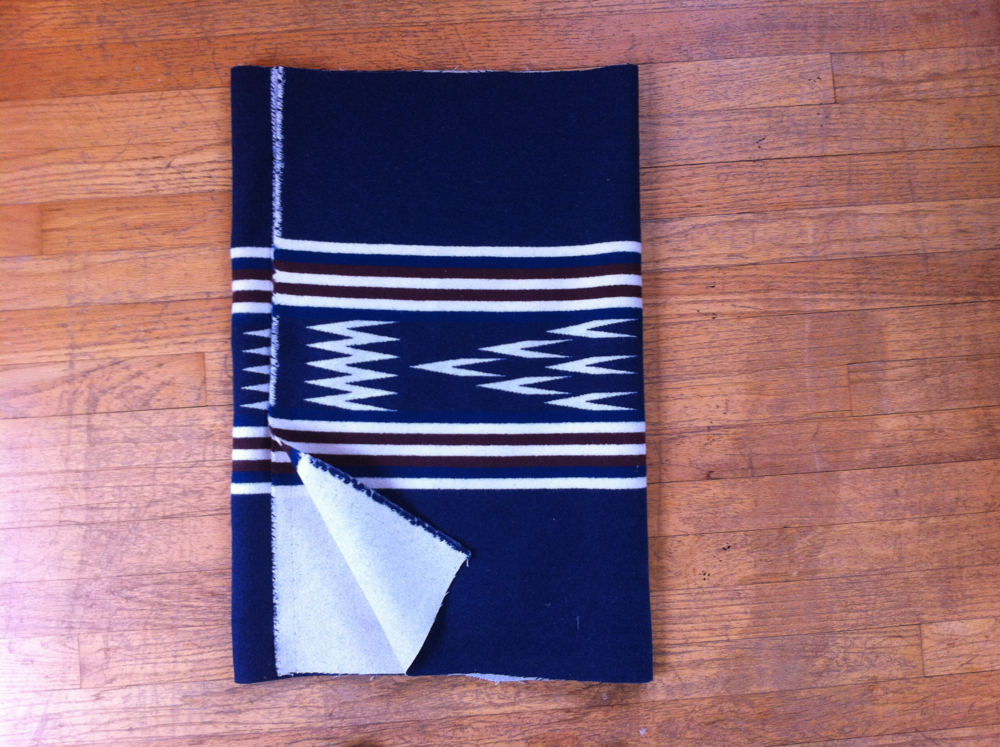
You’ll need:
- 1/2 yard each heavy or medium-weight outer fabric and lightweight lining (I used a Pendleton jacquard in blanket weight from the Woolen Mill Store, and Michael Miller Cotton Couture in chocolate for the lining; note, 1/2 yard of the 64”-wide wool yardage I bought is actually enough for two bags.)
- Straps of your choice (I used 1 1/2” suede straps from the WMS, 60” total length)
- Sewing machine, scissors, pins, complementary thread, measuring tape, and basic sewing supplies
A few tips:
- This project uses all 1/2” seam allowances, and I used a longer stitch length than usual to sew the heavier wool fabric. Test yours on scraps.
- Press your wool using a steam iron or spray bottle of distilled water, never a dry iron.
- Match your border print details carefully at the seams, as mentioned in the first step. I like to put a pin through both layers to make sure the stripe edges are perfectly aligned. They will line up beautifully on the sides of your finished bag if you take a few extra minutes while you’re pinning! If they don’t match the first time, simply seam-rip and try again.
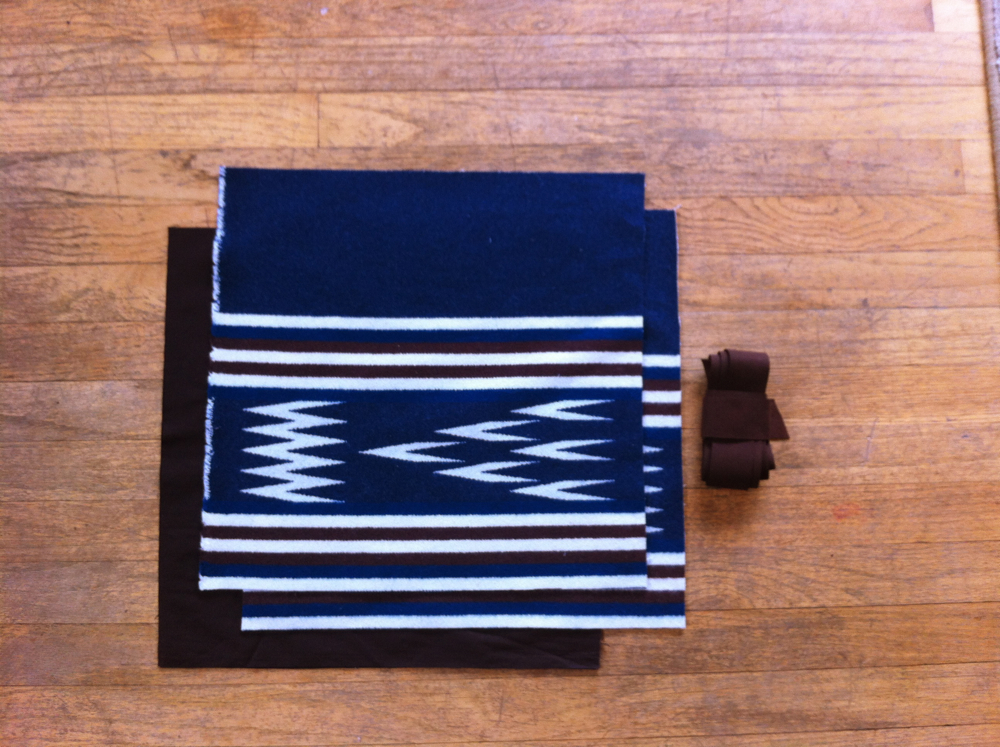
1. Cut two 16” x 16” squares of both your outer fabric and lining fabric. (You can include the narrow woven selvage of your wool if you like – it will disappear into your seam allowance.) Cut your straps to the length you prefer; I used two 30” straps for my tote/shoulder bag. Now press your paired outer and lining fabric square sets and pin each of them together, right sides facing, around three sides of the perimeter. Check to make sure any border print details (like my stripes, for example) line up neatly at each side, so they will match at your finished seams. Leave the top open, and leaving a 7” opening at the bottom of your lining fabrics.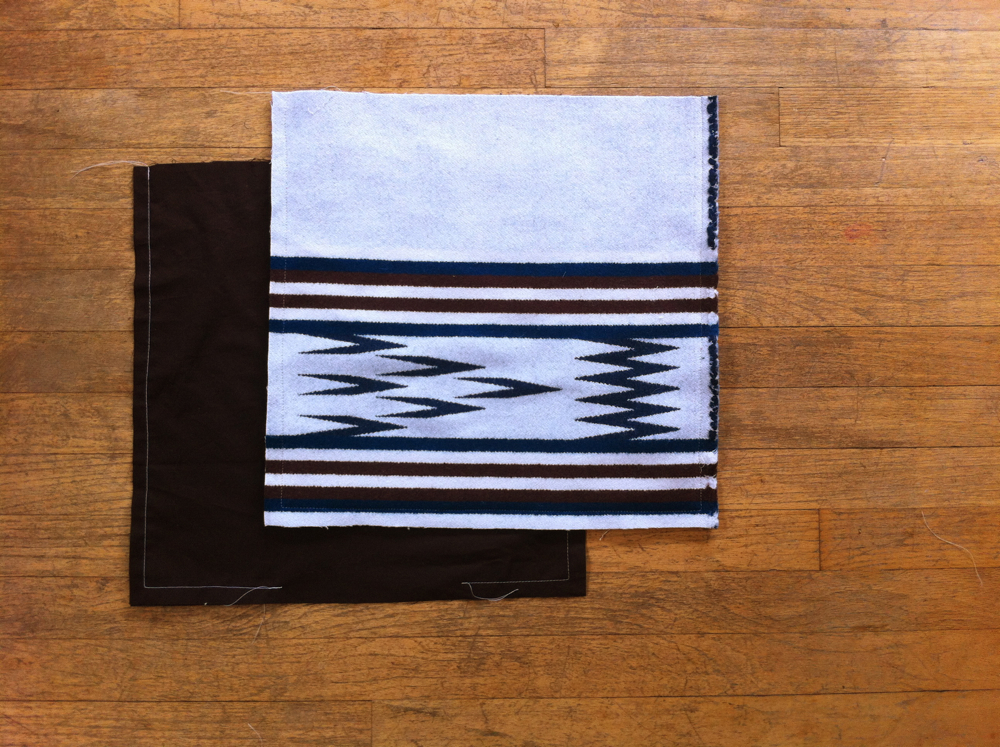 2. Using a 1/2” seam allowance, stitch around three sides of your outer fabric, backstitching at the beginning and end of the seam to hold it securely. Stitch your lining fabric the same way, but leave the 7” opening unsewn (I used white thread in the photo above so it hopefully shows more clearly!).
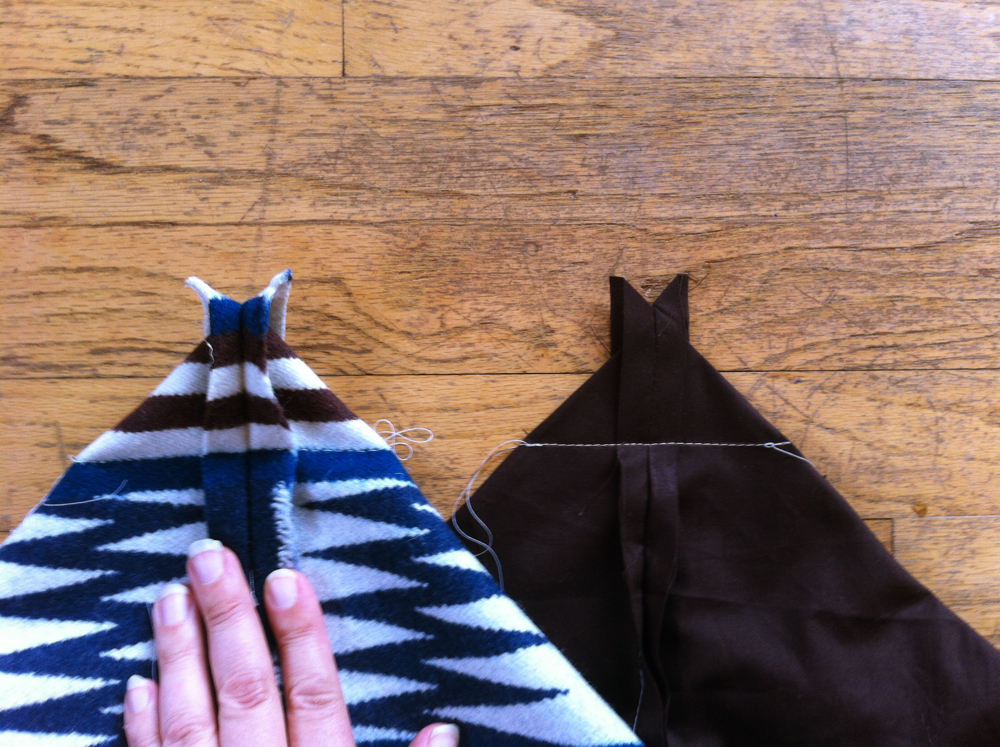 3. Create a box corner at each side of your outer and lining fabrics, pressing the sides flat to create a triangle, marking 2” over from the tip of the triangle, pinning, and stitching in place, backstitching at the beginning and the end to hold the seam.
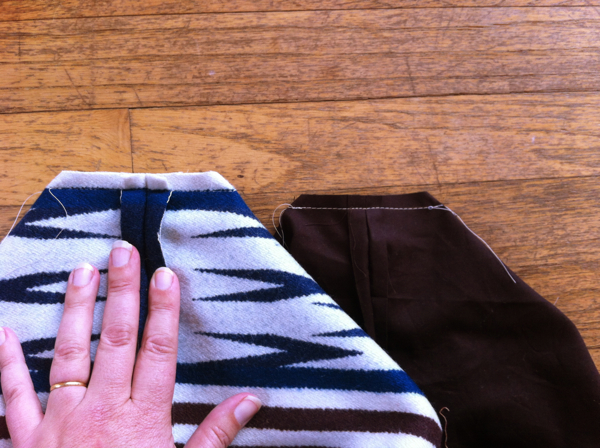 4. Trim away the excess fabric above your box corner seams, as shown. Gently shake your outer bag and lining sections out so that they both form a 3-dimensional bag shape with structured corners (as seen in the photo below) and press your side seams open. Remember, your lining will still have an opening in the center – this is crucial for turning your bag right side out in a few minutes!
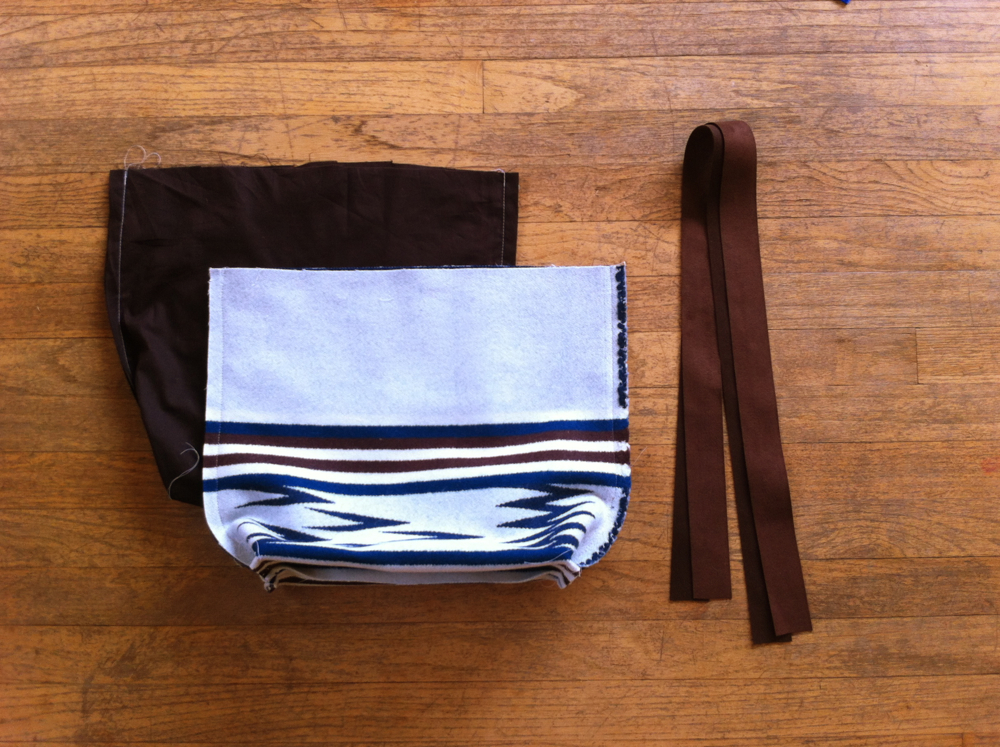 5. Turn your outer bag right side out and mark your strap placement on both sides (as shown below) – I placed my straps 4” from the side seams. Pin your straps at that spot on each side of the bag, with the ends just above the raw edge of the fabric, and check to make sure they are evenly placed, and without a twist in the loop of the straps.
 6. Ease your outer tote bag inside the lining, with right sides facing, and the straps tucked between the two layers. Pin all around the perimeter, matching side seams and checking once more to make sure the straps line up neatly on each side.
 7. Stitch around the perimeter of the tote bag opening, back-stitching to hold the seam at the beginning and end, and using a 1/2” seam allowance. I like to double-stitch the four straps for security, simply reinforcing those areas and back-stitching again each time. Turn your bag right side out through the opening in the lining and shake it out. Press, pin, and machine- or hand-stitch the opening closed.
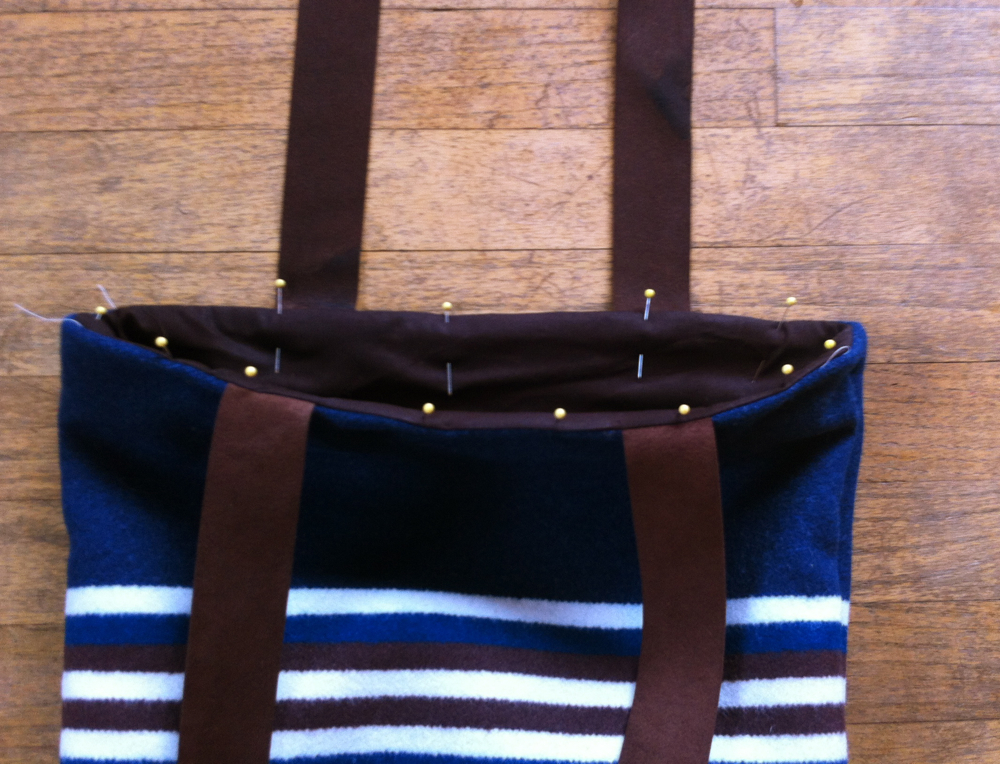
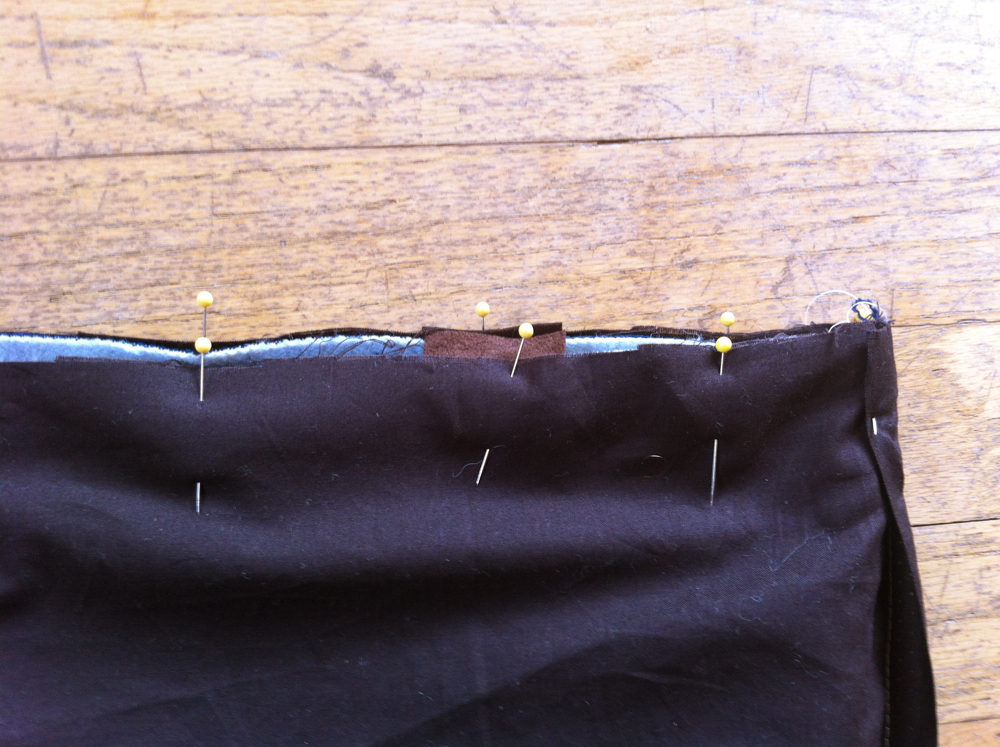
8. Press the perimeter of the opening of your tote bag and pin the lining and outer layers together as shown, with straps arranged neatly and straight. Top-stitch to add stability and a more tailored look. I like to top-stitch with my lining facing up and outer bag down, so be sure to use a matching thread and bobbin color for your fabrics.
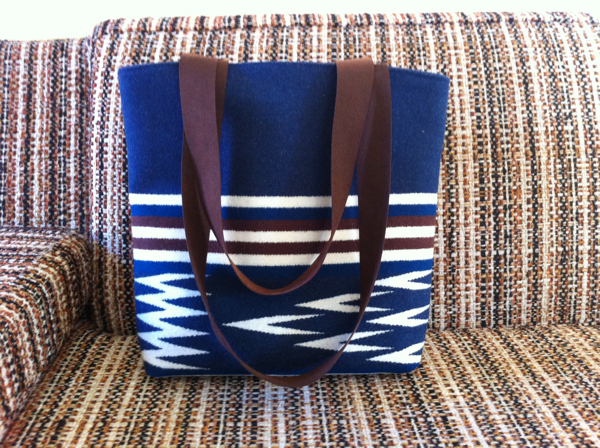
9. Admire your finished tote bag – and be sure to stop by my Sew Mama Sew post to enter to win your own set of Pendleton wool jacquard, Cotton Couture lining fabric, and suede straps for your next project!

Thanks so much to Sew Mama Sew for the chance to write about one of my favorite things, and to everyone who has had kind words for my new book – I am so excited. Powell’s already has it on their author events shelf – yay! Happy weekend and happy sewing!
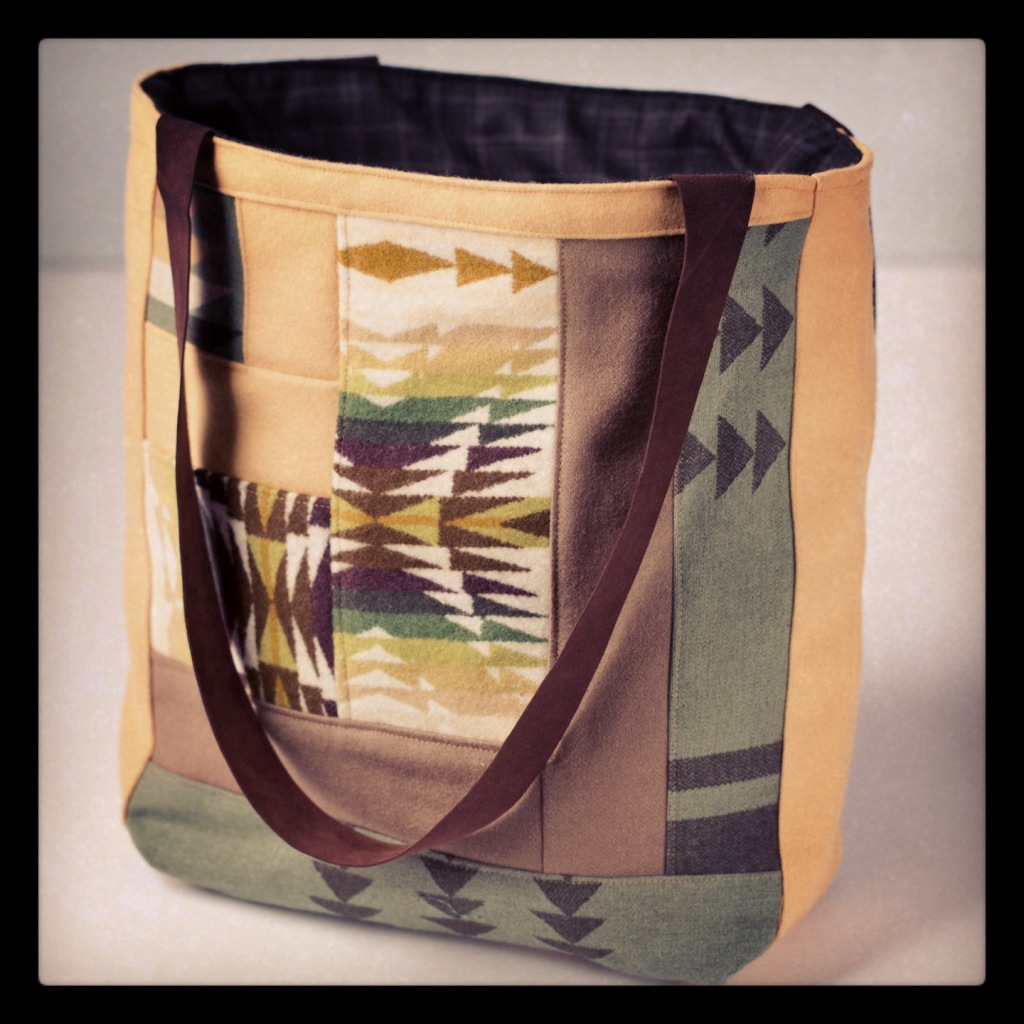
PS – If you’d like to make a quartered log cabin patchwork version of this tote, be sure to check out my Creativebug class – the fourth class in the Log Cabin Quilting series covers both a colorful quilting cotton and luxurious wool version! You can get a free 14-day trial to watch unlimited classes when you sign up with the site.
*During the entire month of September, all the amazing fabric at the Pendleton Woolen Mill Store is on sale – from 30-80% off! You can shop in person here in Portland, look through fabrics on their website, or call 503-535-5786 for mail order.
Leave your comment to Cancel Reply