


fastest Easter skirt in the west March 30, 2013
I made Pearl an Easter dress a few years ago (which she can still wear as a top) but this year I had my heart set on sewing her a special Easter skirt.
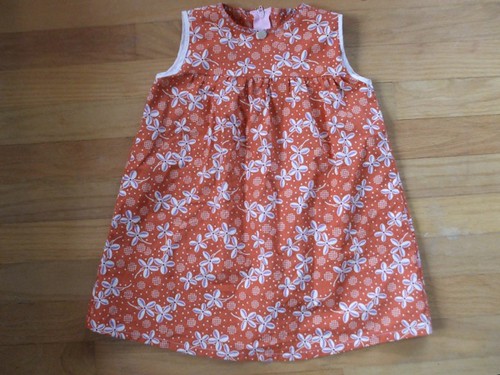
I still love this little dress, but she’s just not a dress kid. She loves wearing skirts, and I thought trying a few of my usual sewing tricks with a half-yard of nice quilting cotton could end up making her a cute elastic-waist skirt. Little did I know it actually is the easiest and quickest skirt method I could have ever imagined! I’m sure someone else has done this type of project a million times but I was pretty thrilled to pull this off. Here’s how I did it. (Note – Pearl is a very tall and lanky four-year-old, so I’d say this would be great general sizing for toddlers and preschoolers, if you adapt the waist to resemble an elastic-waist skirt or simple pair of pants that fits well.)
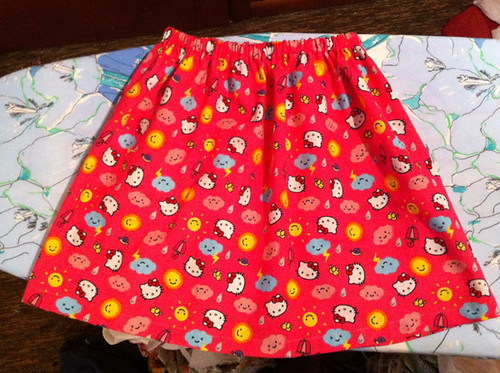
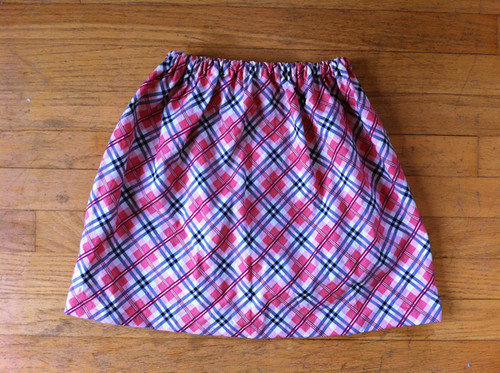
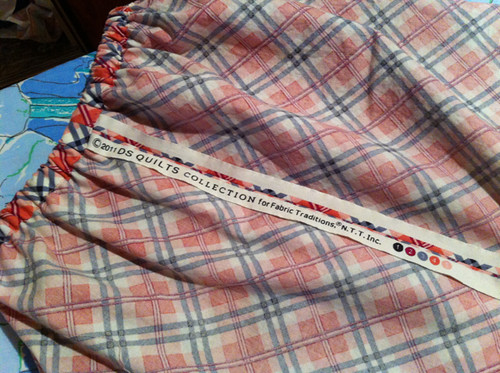
My first try was with a half-yard of Hello Kitty fabric I bought at West Seattle Fabric Company last summer on our PNW MQG meet-up weekend, improvised as I went with what sounded like it would work the way I pictured in my head. It all went smoothly (ok, I did get the seam ripper out once when my waistband was too narrow, see below) but in about 15 minutes I had a simple, perfect little skirt for her! I took no process photos so I tried to get those snaps while I was making the second skirt… the Easter skirt!!! Pearl and I are going to have mother-daughter Easter skirts with my favorite Denyse Schmidt Aunt Edna/JoAnn diagonal plaid print in the pink colorway (her) and the gold colorway (me!). Unless she desperately wants to wear the Hello Kitty skirt to church. Hmm, maybe I should unveil that one afterwards…
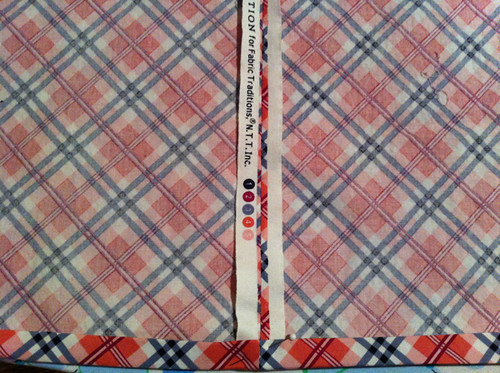
To start, you’ll need a half-yard (18″) of 44″ wide quilting cotton, some 1/2″ flat elastic (you can go wider than this but I’m not sure narrower would work well) threaded through an elastic guide or safety pin, sewing machine, thread, scissors, etc. Pre-wash the fabric and press it, folding it with right sides together and selvages matching at one short edge, so it measures about 18″ tall by 22″ wide folded.
Stitch along the 18″ open side to join the selvages, back-stitching at the beginning and end of the seam, and catching all white or printed selvages within the seam so they don’t show (likely, 1/2″ or so, depending on how wide your printed part is). Press the selvages open. If you’re lucky, you can spotlight the printed section right into the skirt, which is cute! No seam-finishing required if you just use the selvage edges as your only seam (a nice bonus).
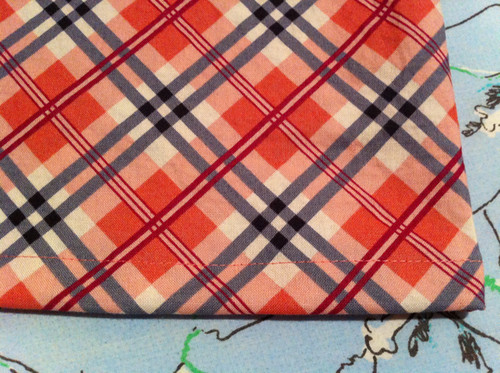
Press the bottom raw edge of your fabric cylinder under about 1/2″ towards the wrong side of the fabric, then press again to create a simple double-fold hem. If you have a nice sharp press, you don’t even need to pin all the way around, I just put one in at the seam to keep it neat. Stitch around the hem to secure it, back-stitching at the end to hold the seam.
Now create the waistband (normally I make a skirt waistband first but this pattern is so simple and the waist gathers so much that I think the hem is easiest to make first, my 2¢). Just as you did with the hem, press the top edge under about 1/2″ or a bit less all the way around towards the wrong side.

Now eye how wide your elastic (and most importantly elastic guide or safety pin AND elastic doubled through) is and press your second fold accordingly – you want this channel to be wide enough to accommodate the guide and its elastic cargo slipping through. Stitch around the entire waistband, leaving a 2-inch opening or so at the selvage seam, back-stitching at the beginning and end to hold the seam.
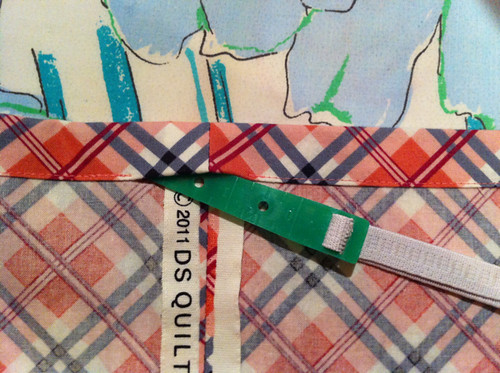
Insert the elastic guide into the opening and slide it into the waist channel, guiding it through with your fingers. (Note – if your guide gets stuck because you stitched a channel that’s too narrow, just seam-rip the rest of the waistband and re-press it with a more generous fold. Ask me how I know…) When you reach the other side, pull the guide out and gather the elastic smoothly, tugging on both ends. Use a skirt that fits your kid well for a general idea of how tightly to gather it.
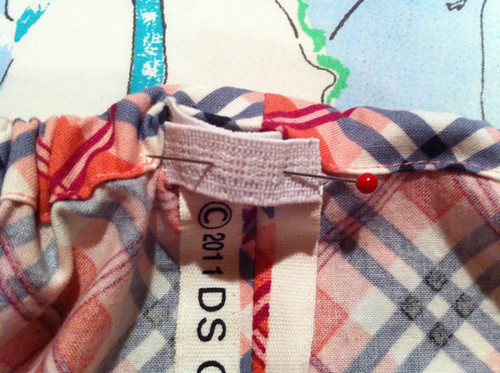
When it resembles that waistband, pin your elastic in place at that point so it is doubled about an inch, and stitch back and forth multiple times to secure it. Trim threads and guide the stitched elastic back into the waistband at the opening. Now press the waistband opening flat and stitch it closed, back-stitching at the beginning and end of your seam for security.
That’s it! If you pre-wash half-yards of cute fabrics with your regular laundry you will always be ready to sew up a kid’s skirt. Next stop, appliqueing a t-shirt for her in the same pink plaid, plus something fun for Everett too. (Note – I wrote this mostly up on Thursday night and it’s now Saturday morning, and I’ve sewn her two more skirts! They are addictive! I came up with a new idea too and I’ll post that next week… here’s a hint for now – LOVE this fabric:)
Happy Easter/April/spring/skirt weather, everyone!
Leave a Reply