


make it: draft snakes! December 8, 2011
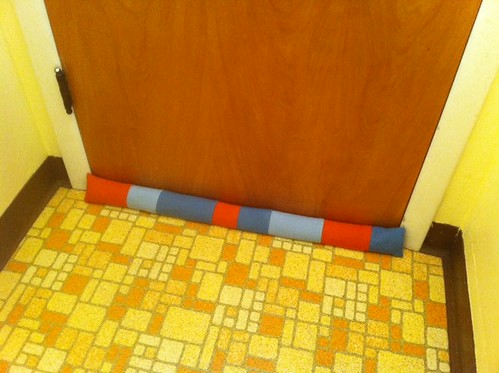
Thank you to everyone who liked the two draft snakes I made this fall and asked for a tutorial – here you go! You can totally personalize yours as you like, I wrote up a couple of variations to try. I made one single-layer patchwork draft snake pieced from varying lengths of orange and blue wool fabric for our back door (which is pretty flat/flush with the doorway),
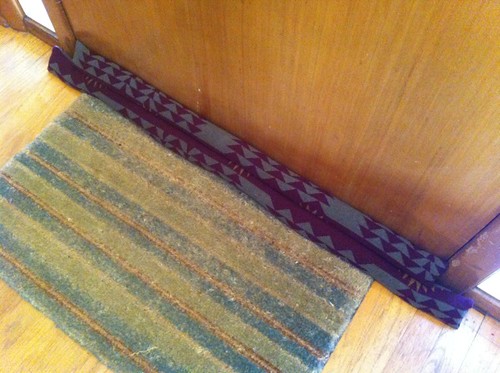
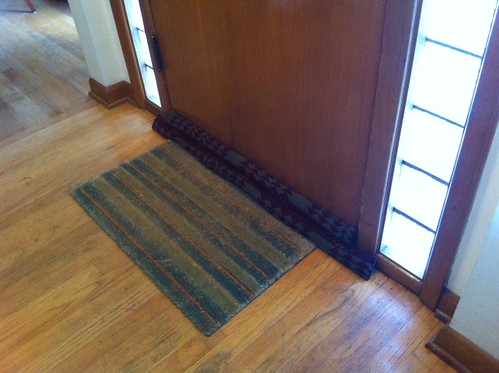
and another double-layer one in all the same fabric to fit our vintage (1950) set-in front doorway. A single fitted draft snake just kept rolling away from the bottom of the door, so adding a longer base kept it sitting neatly in place.
Some basics: You can use any sturdy fabric you like for these. I got all my wool fabric at the Pendleton Woolen Mill Store here in Portland, but you could also use home dec fabrics of any type or reclaimed denim.
I’d stay away from whites and light colors that might show dirt quickly. My bright colored one hasn’t had any problems, especially since wool is easy to brush clean, but the darker one seems totally stain-proof.
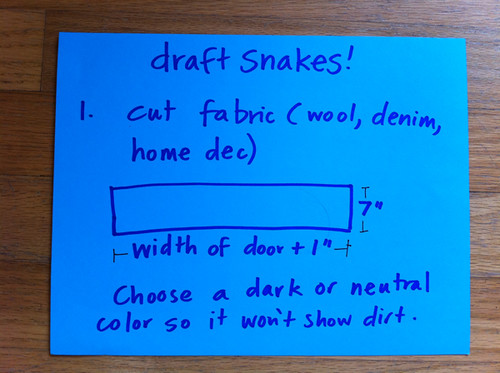
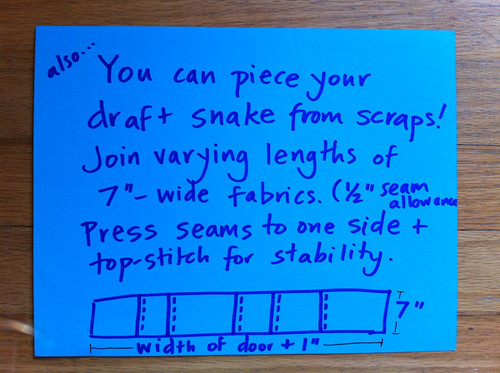
For this project, your basic formula is to start with a single or patchworked/pieced length of fabric that’s 7 inches x (the width of your door + 1 inch – so, you’d cut fabric 37″ wide to fit a 36″-wide door). And you’ll use a 1/2″ seam allowance throughout.
Here’s a super simple tutorial. I’m a low-fi type at heart, and ended up writing/drawing these steps on paper with a Sharpie instead of trying to do any kind of cool digital illustration. Hope you don’t mind…
Step 1: Cutting.
Patchwork variation… easy!
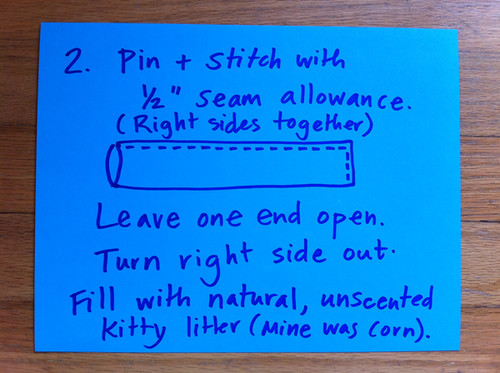
Step 2: Pin, sew, and stuff.
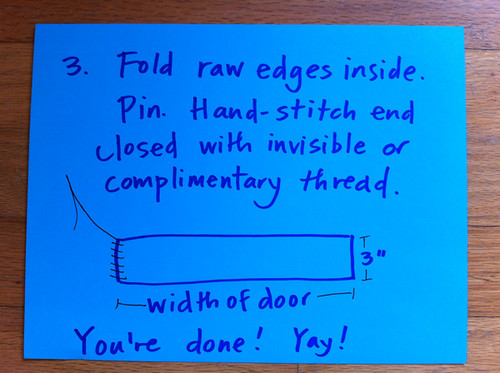
Step 3: Pin and hand-stitch up the open end.
Double draft snake variation!

Please let me know if you have any questions about the tutorial, and I would love to see your draft snake if you sew one. It’s gotten so cold around here, and I’m so glad to have these little guys guarding the front and back doors… seriously, in an hour or so, you’ll have a couple made and can finish the rest of your holiday crafting in cozy, non-drafty comfort! Or hey, you can stop by a friend’s house, casually measure the door, and make this as a surprise holiday gift.
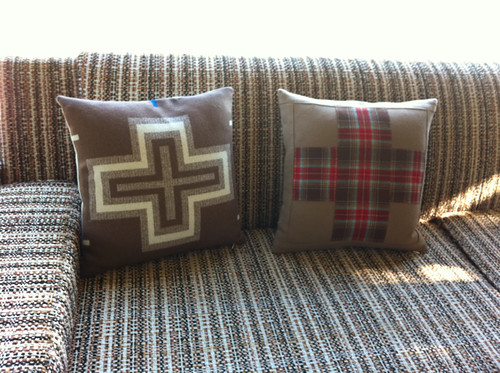
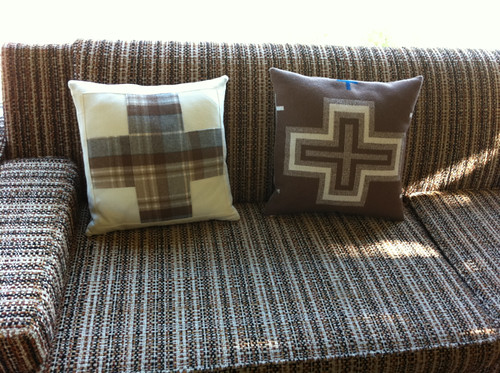
One last thing: I’m teaching my Woolen Cross Pillow class at the Pendleton Woolen Mill Store on Saturday, December 17 from 10am-12:30pm ($40 includes all materials, plus extra fabric to bring home for a 2nd pillow). Portland Modern Quilt Guild members now get $5 off any Woolen Mill Store class, plus 10% off any purchases at the shop, so be sure to show your PMQG card to get both discounts!
Michelle is also teaching some great classes at the WMS this Sunday, December 11 – Stuffed Penguin (11am-1pm, $25) and Wool Nesting Baskets (2-4pm, $40). Check out her post for photos and more details!
Leave your comment to Cancel Reply