


the MLCQ guide to bias + binding tape April 18, 2011
I wanted to write up a little Modern Log Cabin Quilting-specific guide to which binding tapes I recommend using for the various quilts and patchwork projects in the book, so here goes! I hope this is helpful for everyone who’s new to hand-making their own binding tape, along with people who are choosing from a shelf full of rows and rows of differently labeled + sized possibilities at the fabric store or online, or even vintage versions at an estate sale or thrift store. I know it can get pretty confusing!
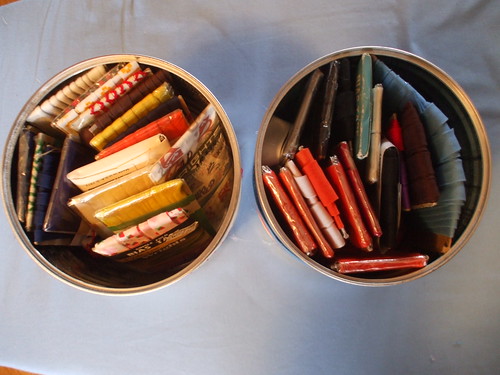
some of my premade bias tape, mostly vintage packages…
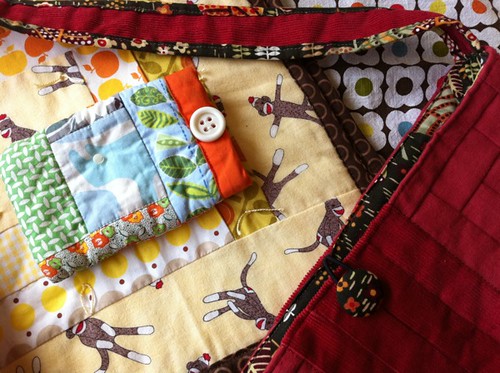
The MLCQ projects I designed use either 3/4″, 1″, and 2″ wide binding tape. Here are examples of all three widths for comparison – the Red Cross Bag uses 3/4″ tape on each side of its strap, the Sunshine and Sock Monkeys Baby Quilt uses 1″ tape for its binding, and the Charming Camera Case uses 2″ tape to edge its button/Velcro opening.
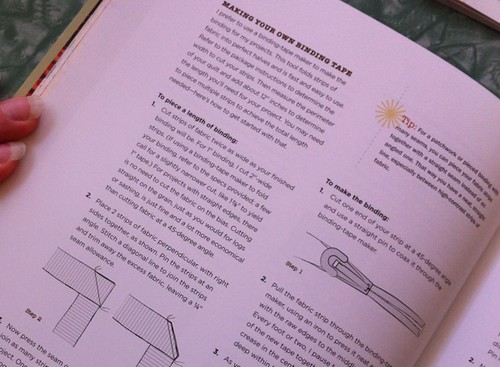
First, a little background… the complete written + illustrated instructions for making your own binding tape of any width are on page 38 of the book. For straight-line projects like the edge of a bag strap or coaster, or binding a quilt, you can use straight-cut (selvage to selvage) strips of fabric to make your binding tape, which is a fast and fabric-efficient way of cutting. You can guide the strips through a specially shaped bias tape maker (I recommend Clover brand, but there are many other options) to fold the raw edges to the center while pressing them flat with your iron for a neat, even appearance. The width of this flat tape is what I’m referring to as 3/4″, 1″, 2″, etc. Once you’ve created the flat tape, you press it again lengthwise to fold it into equal halves with the raw edges tucked neatly inside. This method is the one I used to make binding tape for the quilts and projects in the book.
BIAS VS. BINDING TAPE
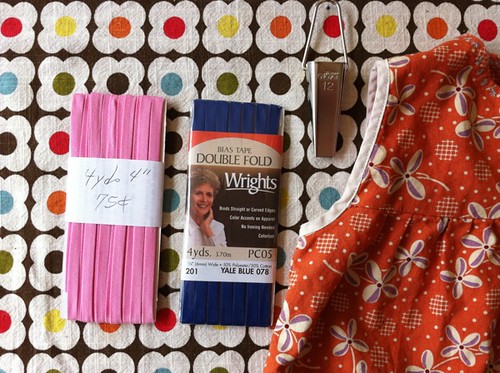
For curved applications that need to stretch, like clothing or a rounded pocket edging, you’d need to use bias-cut strips of fabric (which is cut on the diagonal) to make your bias tape (see this great Colette Patterns tutorial for more on this approach). As an example (not an original book project, this is a personal sewing project with a vintage dress pattern!), I used 1/2″ bias tape for edging part of my daughter’s Easter dress last year so I didn’t need to add extra armhole facings. Here’s the dress with a few packages of pre-made 1/2″ bias tape and a 1/2″ maker (labeled 12mm).
Most if not all commercially available premade versions of all the tape widths I’ve mentioned are bias tape, which works great for either application – straight or curved. I used store-bought bias tape for several projects (the Block Pocket Apron, Charming Camera Case, and Drawstring Bag), but you can certainly choose to make or buy your own for any of the projects in the book, it’s up to you.
Okay! On to the binding tape sizes + details…
1″ BINDING TAPE
This is the size of binding tape I use for machine-binding my quilts (as well as for a few other patchwork projects). For this very popular size, you can easily find it at a fabric store in solid colors in approximately 3-yard packages, folded or flat (there’s one labeled package of folded 1″ tape as an example in the photo below) – or make your own. To make this one, you’d use a 1″ binding tape maker (which can also be labeled 25mm) and strips of fabric cut to 1 7/8″ or 2″ wide (check your packaging to see what the maker you’re using recommends). When this tape is folded and stitched around a quilt’s or project’s edge, 1/2″ shows on each side – the 1″ refers to how wide the finished tape is when flat (unfolded).
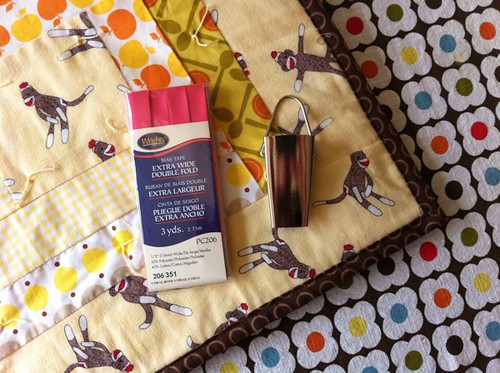
The projects in the book that use 1″ binding tape are:
1″ QUILTS: Sunshine + Sock Monkeys (pictured), Housetop, Modern Crosses, Vintage Linens, Bright Furrows, Northwest Modern, + Anniversary. [The Winter Woolens, T-shirt Memory, and Clouds in the Sky Quilts don’t use binding.]
1″ PATCHWORK PROJECTS: Cheerful Potholders + Drawstring Bag.
Can you use another width? For quilts, you could use 2″ wide binding tape (see below for more details on that size) for more of a blanket-style edging, either with straight stitching or zig-zag. I personally prefer 1″ for its streamlined look and neat, clean edge when machine-binding. I wouldn’t recommend going narrower, like 3/4″, especially for a quilt that uses a batting layer. For the two patchwork projects, I’d stick to 1″, especially the drawstring bag which uses a ribbon inside the casing.
2″ BINDING TAPE
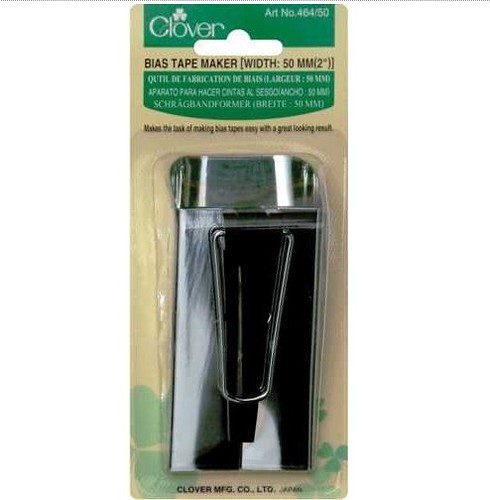
This is the size I use for intentionally wider edging, like a waist sash on an apron or the rim of the camera case. To make this, you can use a 2″ binding tape maker (also labeled 50mm) and strips of fabric cut to 3 7/8″ or 4″ wide (again, check the packaging to be sure what your maker suggests).
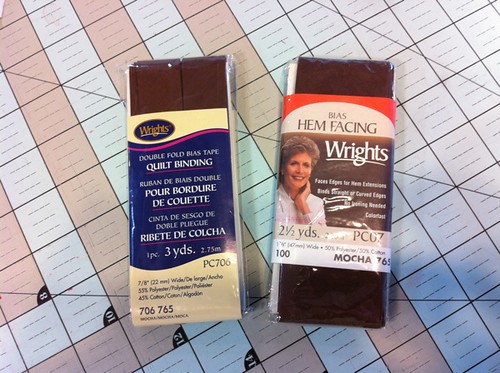
You can also buy 2″ tape at the store, which I did for these projects – here are two labeled options for similar versions (1 7/8″ – 2″) of this very wide bias tape, one folded (the one labeled quilt binding) and one flat (the one labeled hem facing). Since this size is less common than the 1″ tape, I wanted to show a few more details so you can track it down more easily.
When the 2″ tape is folded and stitched around the apron waistband or camera case, 1″ shows on each side – so it’s twice as wide as the standard 1″ tape would look. The 2″ measurement refers to the flat (unfolded) width of the finished tape. Note: the description given in the materials list for the camera case and apron projects is 2″ (extra wide) binding tape, but since narrower-width tapes can also be labeled ‘extra wide’ depending on brand, etc. – the 2″ is the important detail here. Sorry for any confusion!
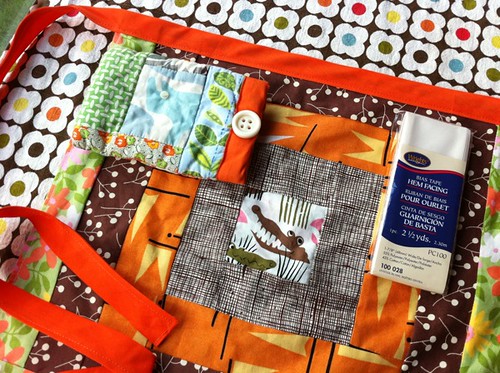
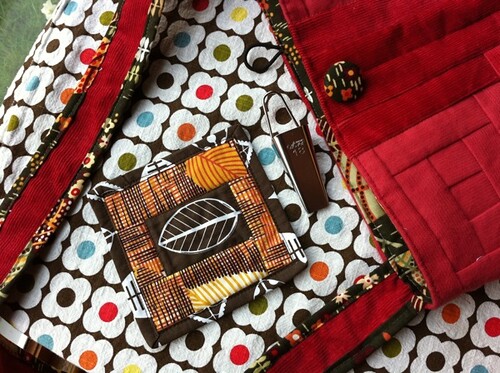
2″ PATCHWORK PROJECTS: Block Pocket Apron and Charming Camera Case (pictured).
Can you use another width? Yes, you can use 1″ tape for either the apron or camera case projects. The case uses a double layer of batting so just make sure you can fit all four layers (lining, batting x 2, and outer fabric) inside the narrower tape before binding. For the apron, a 1″ sash will obviously be much narrower as a finished element of the garment, so it may fold or crease on itself like a ribbon instead of keeping its flat, smooth appearance while you’re wearing it. I wouldn’t recommend going narrower than 1″ for either of these projects.
3/4″ BINDING TAPE
For a slightly narrower edging, like the strap of a bag or the edge of a tea towel, or binding a smaller coaster, this is the size I use. To make this, you use a 3/4″ binding tape maker (also labeled 18mm) and strips of fabric cut to 1 3/8″ or 1 1/2″ wide (check packaging). When this tape is folded and stitched around a bag strap or coaster edge, 3/8″ shows on each side – the 3/4″ measurement refers to the flat (unfolded) tape.
3/4″ PATCHWORK PROJECTS: Roundabout Coasters (pictured), Color Block Tea Towels, + Red Cross Bag (pictured).
Can you use another width? For the bag and tea towel projects, a 1″ tape would be an easy substitution. Personally, I liked the look of the narrower tape on these two, but if all you have handy is a 1″ maker or package of tape, that’s a good choice too. For the coaster, since it’s such a small piece, binding with 1″ tape is a little trickier. I’m sure it can be done but I liked using the streamlined 3/4″ tape, especially at the corners.
This is just a quick photo post for now, but I’m hoping to make a short video showing how I make binding tape soon, which would go with the full written + illustrated instructions on page 38 of the book. Any questions? Please comment and I’ll do my best to answer them and update with any helpful details!
Leave a Reply