


button holiday decorations! December 21, 2010
Hello! I can’t believe it’s been a year since I last posted, also just before the holidays, but I guess it has. I’ve been pretty busy finishing two new craft books and meeting our brand-new baby (Everett!) – so the months have just flown by without much time to do button crafts, let alone write about them. But this week I am happy to have my mom in town to cuddle the baby and read books to Pearl, so I’ve gotten a chance to do a few Christmas-y button projects too.
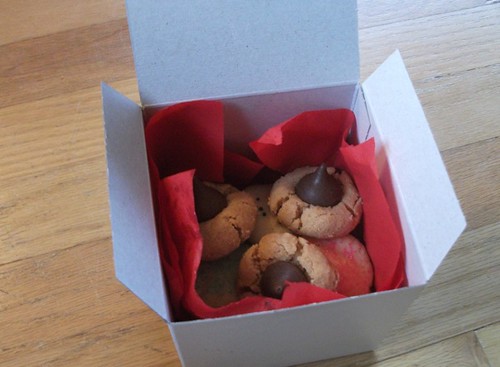
I made three batches of Christmas cookies this month: peanut butter kisses, sugar cookies (from The Christmas Table cookbook), and coconut-almond brownies. So many of our Portland friends have been so thoughtful since Everett arrived, and I wanted to send along a little box of cookies with my thank-you notes.
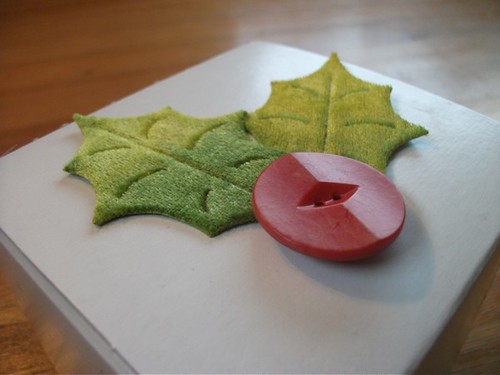
One lucky find of a box of soft, velvety holly leaves later, I had a super-simple decoration in mind to decorate my cookie gift boxes. All you need for this mini-project is a box or bag to decorate, a red button, two green leaves (I found mine premade at Paper Zone, but you could use vintage leaves, or cut them out of fabric or paper), and double-stick tape. Just use small pieces of tape to secure your leaves to the box, and then add a favorite button right over the join with another piece of tape.
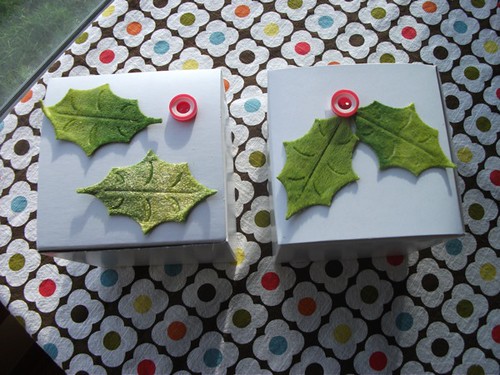
This way, your recipient can reuse the holly decoration when she recycles the box… but if you’re decorating something nicer (like a metal or glass canister to save), you could use hot glue instead of tape for a more permanent bond.
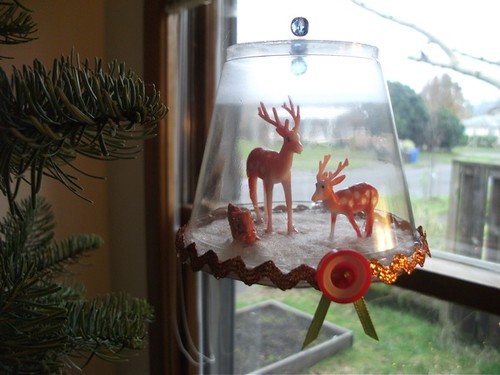
I also made some winter wonderland ornaments using this lovely tutorial (I posted lots more about these with more photos on West Coast Crafty) and added a little button-ribbon rosette embellishment to those, too. This one is just as simple to do – all you need is a couple inches of light green ribbon (I used 1/8-inch satin ribbon from the craft store), a red button, and a hot glue gun.
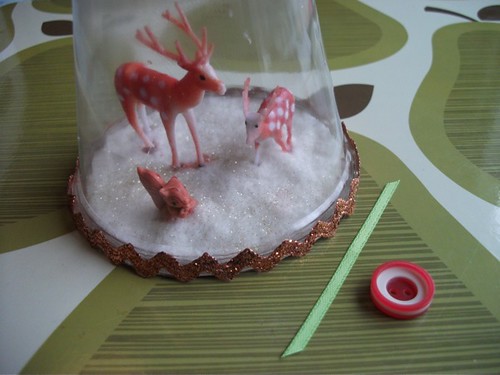
First, fold the ribbon in half like an upside-down V (or the bottom section of a prize ribbon) and add a dab of hot glue right where you want the rosette to go. I added mine off-center on the rick-rack edging at the base of the ornament. Press the folded ribbon into the dab of glue, right at the fold, and let it set.
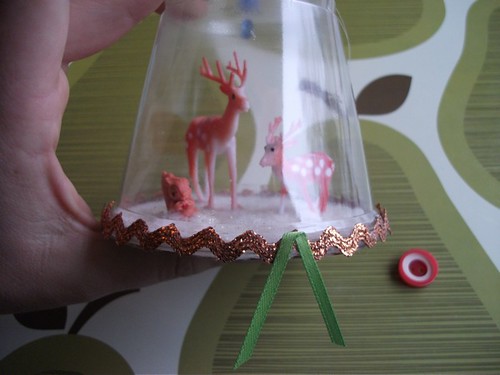
Add another dab of hot glue at the fold and press your button into that. Trim your ribbon edges as short as you’d like (I cut mine at an angle) and you’re all set!
Hope you have lovely holidays! I’ll be back much, much sooner next time…
Leave your comment to Cancel Reply